Did you enjoy ripping & tearing in Doom and want to do some in Blender too? Then look no further. I’m going to show you how you can put some ladders in your digital tights (Pantyhose?) or tear up a shirt using Alpha or Opacity textures.
Why Rip & Tear With Textures?
The main reason for using textures is that the resolution you would need on your mesh to make good looking rips is going to be unreasonable in most scenes. There will likely be occasions where it is suitable, but for most of us an extra texture is much more reasonable.
I’m going to show you a simple way you can do it that is completely free in terms of software used.
Free!
The software used here is free, you will have to source your own rip/tear alphas which can be difficult to source for free. More on where to get them later.
An alternative free way is to use Blender’s Texture painting tools, however I have not been able to get them to work at all since version 3.4 was released so I will not be covering it here.
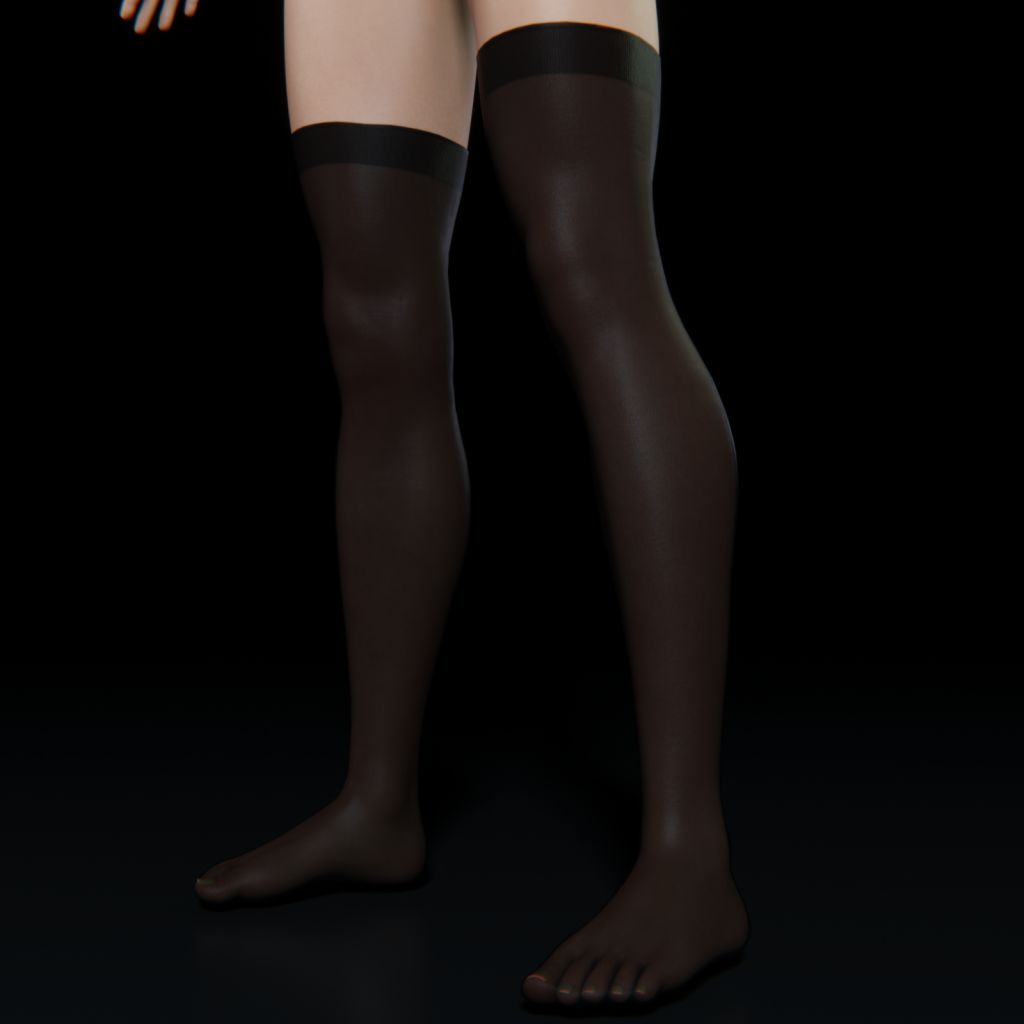
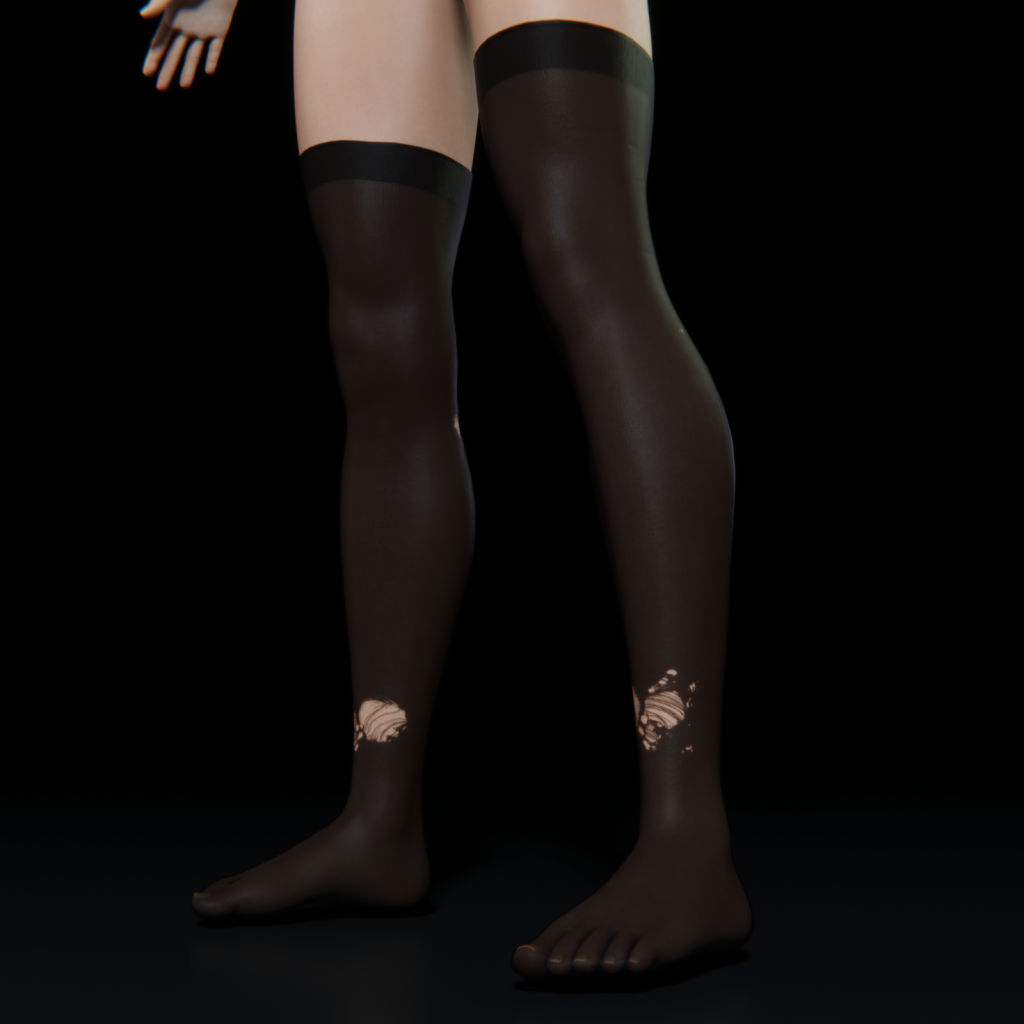
I am going to assume you already have your outfit or piece of clothing. It should be UV unwrapped and already textured. I will be using some Knee-highs imported from Daz as an example.
Finding Rip/Tear Alphas
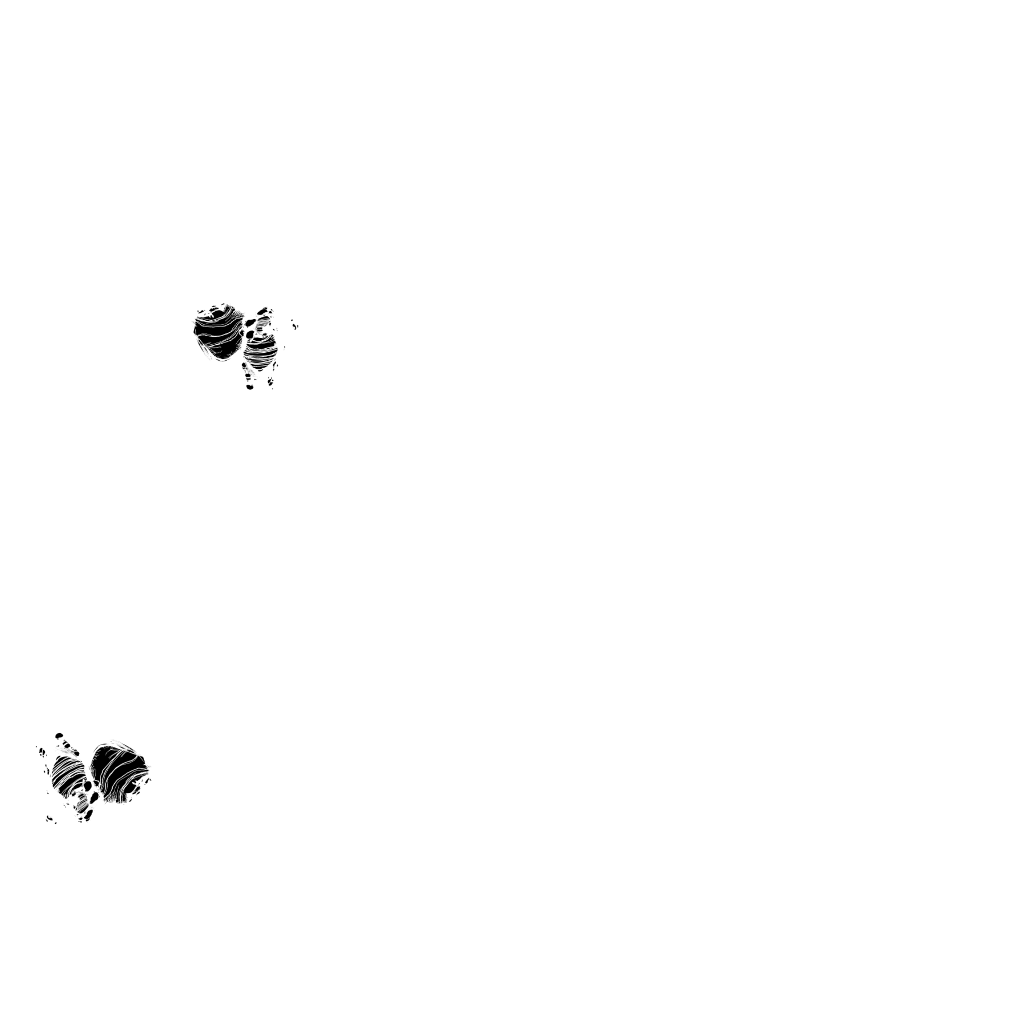
Before you can make a texture, you will need some ‘alphas’ you can use. These are black & white images that are most commonly used for brushes in Z Brush. Unfortunately free options are quite rare with most of them costing you some hard earned cash.
You can find some on Artstation although their licensing restrictions are some of the most annoying bullshit to deal with.
Another option is this pack on Gumroad it is completely free (just enter 0) but please consider showing the creator some love and donating a little if you have the means. Consider checking out Gumroad further for more options.
Alternatively you may be able to use some from Daz. They have some general use grunge iRay shader packs such as PTF Grungy Threads which use alphas that should be work just fine.
Once you have some ‘alphas’ you can use we move on to the methods in which you can use them.
GIMP, Affinity, Photoshop?
Most of us that work with 3D have some sort of software we use to post-process. GIMP is a fantastic free open source option if you don’t already have one, it does have a learning curve but it is free & powerful so worth the effort to learn.
I will be using Affinity Photo, as I already have that and am familiar with it. You are free to use whatever software you have be it GIMP, Photoshop or even Clip Studio Paint.
Load up the diffuse texture for your clothing piece in your graphics software. We’ll use this as our template.
Why Diffuse Texture?
This texture is the one most likely to show the UV layout most distinctly. If you are using a Daz product you may have a UV template included with it so feel free to use that.
Now in Affinity Photo I would chose File -> Place, select a tear Alpha and arrange it in a suitable location. Use the diffuse texture as a guide to do this and keep within the boundaries. Keep doing this until you have all of them in the locations you want.
I Don’t See ‘Place’
In GIMP this might be ‘Open As Layers’ Photoshop used to also be ‘Place’ or ‘Place and Embed’. You may also be able to drag/drop from file explorer.
Once placed you will want to fill the rest of your texture with white. You can just place a layer filled with white under your tear layers and that should work fine. Save your file, the best option being a PNG.
Placement!
How do you know where to place the tears? Unfortunately this is the disadvantage of this method. Try looking at your diffuse texture and your model to work out where things are. You can use the UV editor and sync selection to figure things out, but I’m trying to keep things as simple as possible.
Now back in Blender we can load this texture onto our clothing.
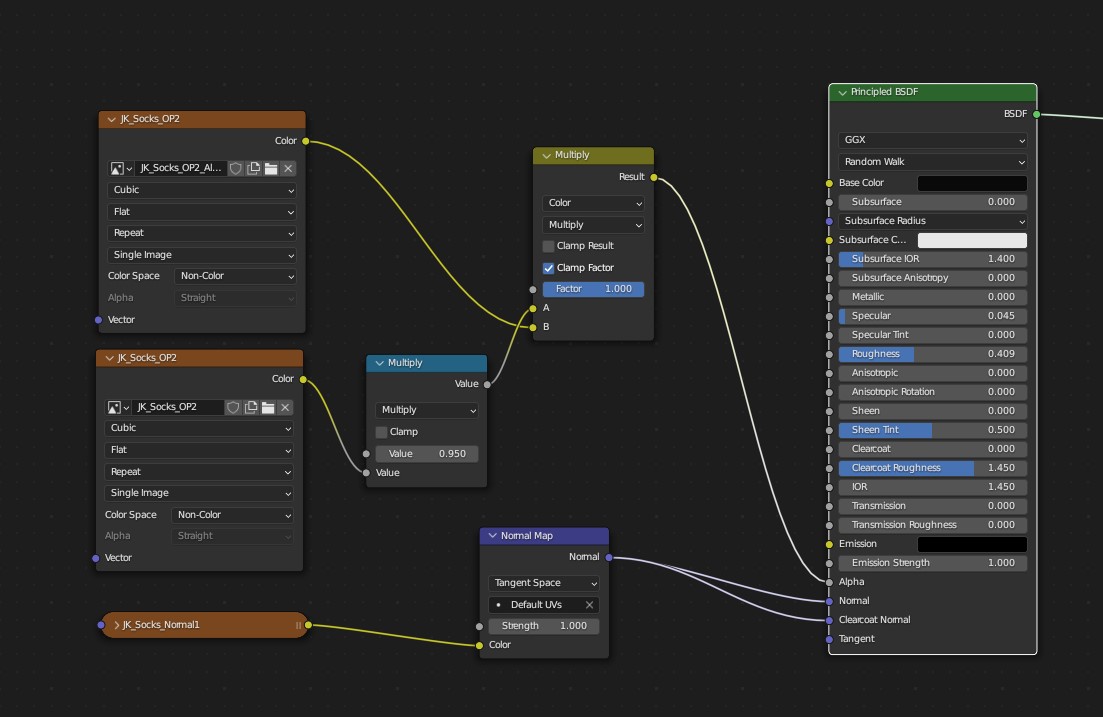
If your clothing does not already use an opacity texture you can just connect your new texture straight to it. However I purposefully picked these Knee-highs to show how you might merge two textures together.
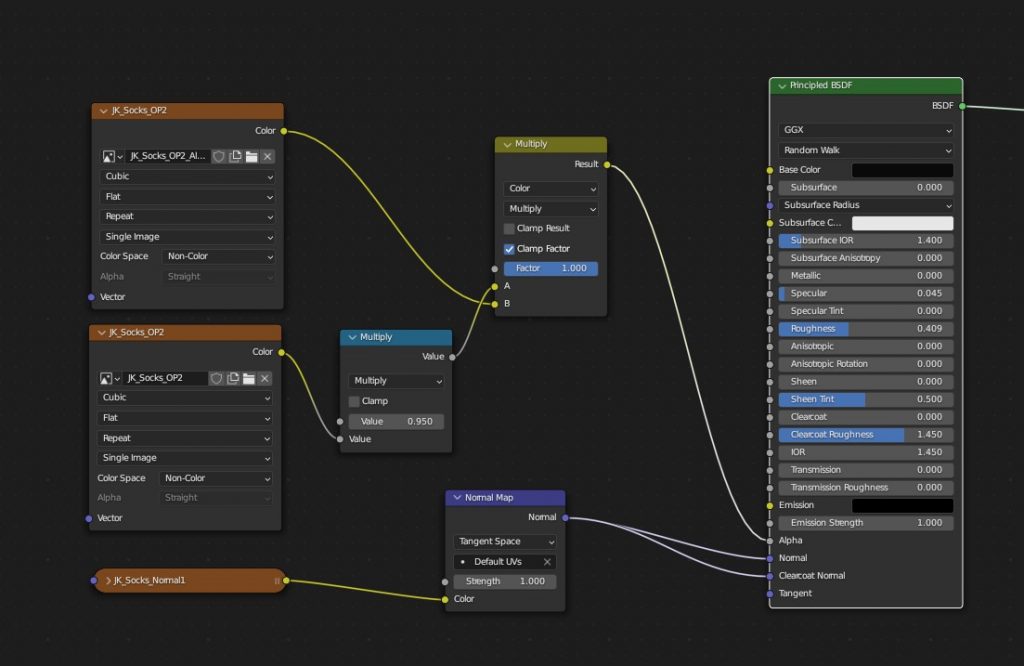
You can simply add a mix node set to Color and Multiply with Factor at 1, then connect your new texture to the B and your original opacity texture to A. This should combine your tears with your original opacity texture.
Why Multiply?
Multiply, in our case, will effectively replace the white in our texture with the original texture, but will make sure our new black tears are punched through the original texture.
This is obviously a very simple example, but the principle is the same regardless of how complex your texture becomes.
If I’m able to get Blender to co-operate with Texture Painting I will make a second part explaining how to use that to do the same thing but with that advantage of being able to place things easier.
I realise this is quite vague in places but in this case it is mainly the process that matters. Your texture will be different from mine and you may be using a totally different software.
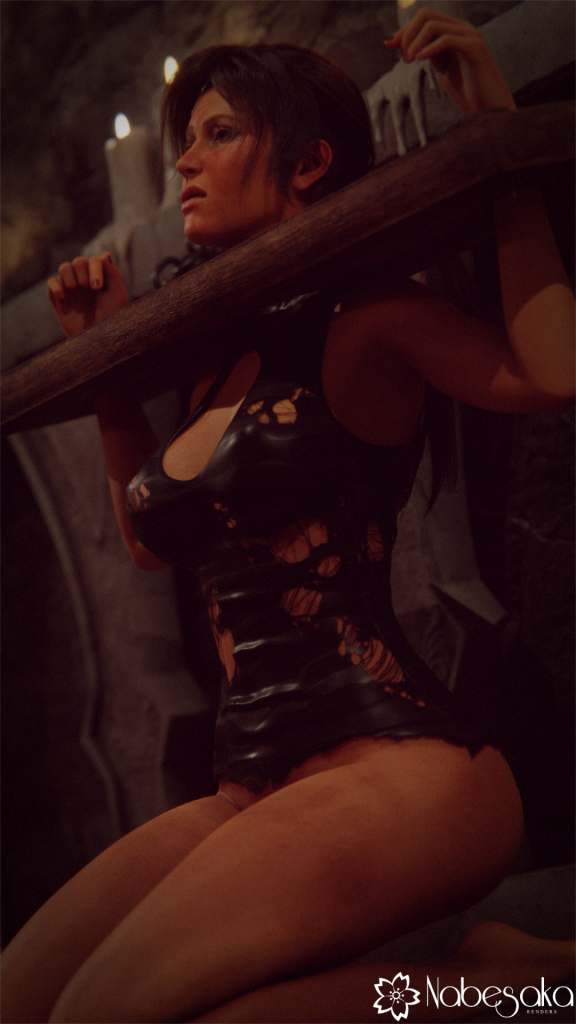
The method shown here was used to add tears to Lara’s dress in the render shown below.
Thank you for reading. If you have any questions please let me know. I will try to answer as soon as possible. Feel free to ping me on Twitter (NabesakaRenders) instead if you want.
Be First to Comment