Something we all love is saving VRAM. One of the best methods is to reduce the number of textures, and what better way to do it than to pack multiple textures into 1.
What is Channel Packing?
Channel packing is a method of saving resources by ‘packing’ multiple textures into a single texture file. It is very common in game development, but can and should be used in general 3D rendering too.
In reality it is simply taking advantage of the multiple available channels in a standard image file. For example a common one most 3D artists will know is a diffuse or albedo texture also having the alpha.
Today we are going to look at how you can do this in Affinity Photo. Ideal for those who want to pack an existing model’s textures to help reduce VRAM usage or don’t use Substance (or similar) to generate model textures.
What Textures Can Be Packed?
You can pack most textures. Just remember that Diffuse & Normal textures already use 3 of the 4 channels. The ideal textures for packing are greyscale textures. It is very common to pack Metallic, Ambient Occlusion, Roughness, Specular, Opacity and even Displacement maps.
Today I’m going to show you how to channel pack some fairly random textures together in Affinity Photo.
Why Affinity? It is probably one of the best alternatives to Photoshop considering it has a one-off cost, but it’s workflow for making channel packed textures can be un-intuitive. That’s not to say it can replace Photoshop, it definitely cannot, but it works well for my needs.
Channel Packing Textures in Affinity Photo
While there are some ‘standards’ for channel packing, provided you are using textures for your own purposes there is no reason to worry about it making sense.
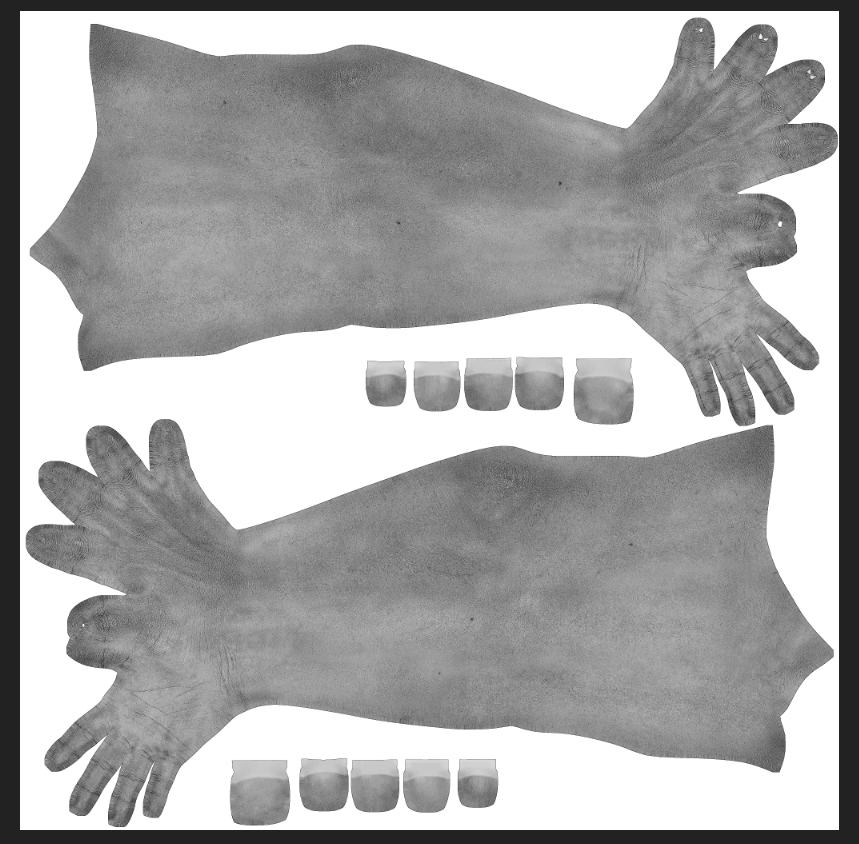
In my example I am going to pack the Specular, Bump and Displacement maps for a model’s arms into a single texture.
In Affinity you can either make a document the size of your textures, for example 2K or 4K, or you can open one of the textures to start from.
Here I have the Specular map open.
Place or paste your next map on top. In my case I’ll place the Bump map in as a new layer. With that layer selected right click on any of the color channels (except Alpha) in the channel pallet and click Create Spare Channel.

It is important to use one of the color channels and not the Alpha channel. The Spare Channel is created from the channel you right-click. Since the source is grey it does not matter which channel you chose. It only matters that you do not use the alpha channel, which in this case contains no data.
If you want you can also rename your created channel (I highly recommend it) to the name of the map you used. You should then delete the layer as the new channel will be retained and we don’t need the actual image layer.
Do this for each of the texture you want to add and you’ll end up two extra channels (or three if you started from a blank document).
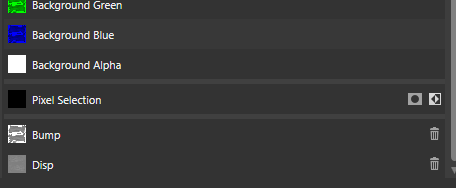
Now we can move them to the color channels. I will use Specular = Red, Bump = Green, Displacement = Blue. To do this right-click the spare channel you want to move and click the Load to Background {color} where {color} is the color channel you want to use.

Here I am choosing Load To Background Green for my Bump channel. I will do Load To Background Blue for my Displacement channel. The Red channel will be left as I worked on my open Specular map.
If you started with a blank document remember to load all of your channels into a color channel. You can even use the Alpha channel if you would like to store 4 textures in 1.
That’s all there is to it. You texture might look visually strange, but you now have all of your textures saved in a single image. Simply export as the format of your choice, I recommend PNG in most cases (there are exceptions), just make sure it supports the Alpha channel if you saved a texture in there.
Using Channel Packed Textures in Blender
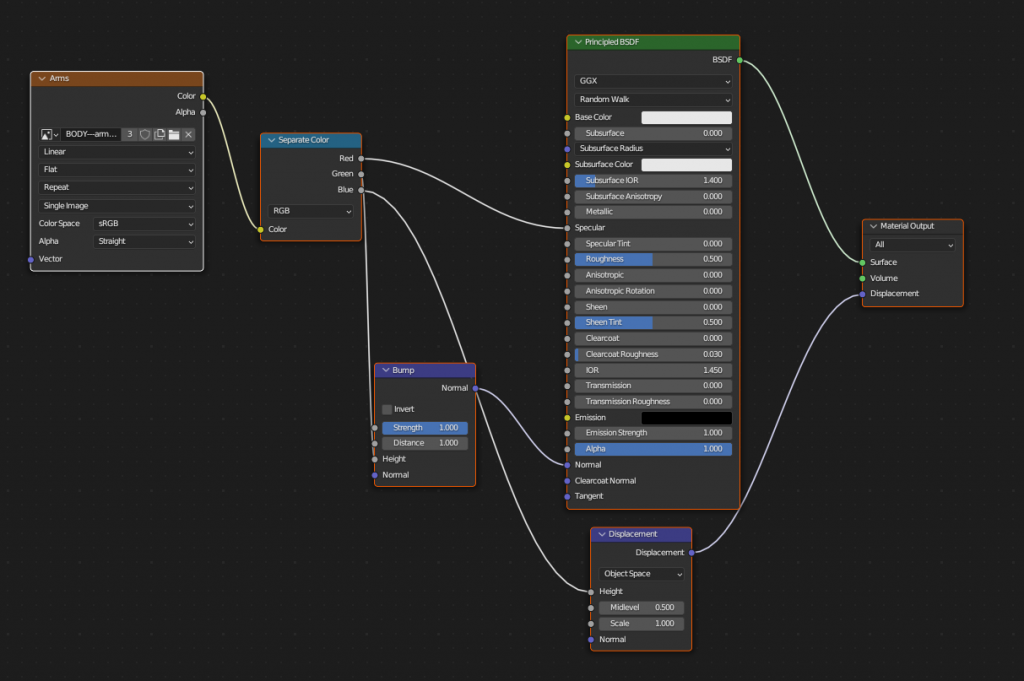
Using these textures in Blender is pretty simple. Simply load your texture as an image, as a standard image node, then use a separate color node and plug-in the R G and B pins to the correct pins of the Principled BSDF (or your custom node setup).
If you need the alpha channel, just grab that from the Alpha pin on the image node. Below is an example node set up for the texture I generated where Specular = Red, Bump = Green and Displacement = Blue.
Channel Packing Textures Complete
I would not recommend channel packing the textures I chose together, but I wanted to use these textures you probably wouldn’t pack together to show that you really can pack pretty much anything together.
Should you? Probably not. However if it is going to save you memory and you aren’t in a team environment then go for it. Just be aware you should probably have a discussion if you are working for a client or in a team.
Be First to Comment