So you want to know how to create that classic Pixar/Disney-esque sparkle effect for the magic spell your character is casting? Well look no further I’ve got the tutorial for you!
You Should Know
While this tutorial is aimed at Blender 2.80 the steps should work on 2.79 and 2.81 as there are no features specific to 2.80 used.
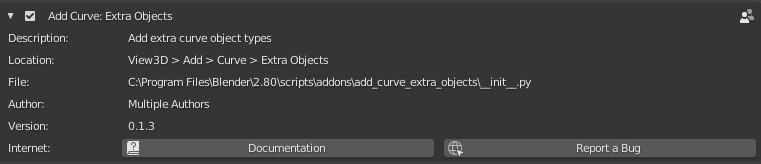
Extra Objects Curves Add-on
First up, if you want to have your sparkles go in a spiral the easiest way to get a spiral is to use the built in add-on.
Head to the User Preferences menu (under Edit) and find the ‘Add Curve: Extra Objects’ add-on. Enable it and you are good to go. This is a built in add-on that comes with Blender so no need to download it.
Don’t want a spiral? No problem. Just make whatever shape you want using a path and you can have your emitter follow that instead.
Make A Spiral
Now we have our add-on let’s make a spiral.
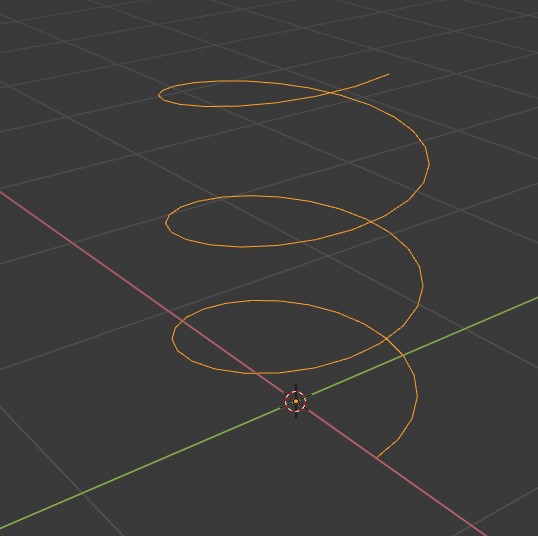
Here is the spiral I’m going with. This is an Archmedian spiral with turns set to 3 and height to 1. I then scaled it down by 0.5. To change the settings use the little menu shown in the lower left of the viewport after adding the spiral (Blender 2.8).
Remember
Change your settings immediately after adding the spiral. The options menu will disappear once you make any other action.
Adding The Particle Emitter
Next we can add our particle emitter. I am going to use a UV Sphere for this, but you can technically use any shape you like as it will be hidden in the final render.
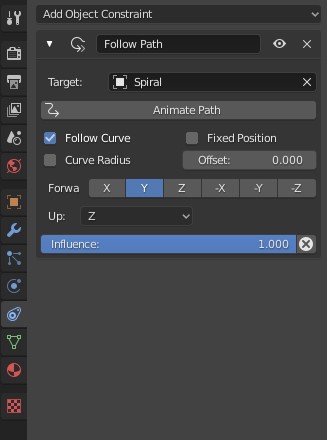
With the UV Sphere still selected add a ‘Follow Path’ object constraint. Select your path and press ‘Animate Path’ and tick ‘Follow Curve’.
The animation will take 100 frames by default. You can change this to whatever suits your needs by selecting the curve and changing the ‘Frames’ option under the Curve options.
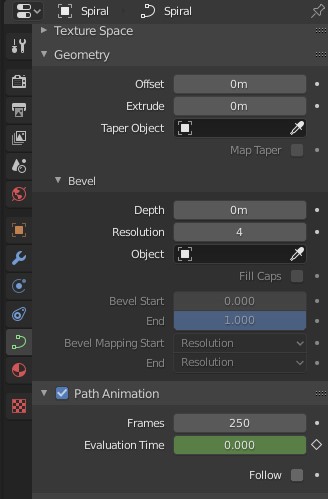
Particle Settings
Now to have our emitter… Well emit something. I’m going to use an icosphere. So create an icosphere and then scale it down, I’m using 0.75. Then hide it via the outliner.
With your emitter (UV Sphere) selected add a particle system. I’m using the default settings for the moment. However head into ‘Render’ and choose ‘Object’ for ‘Render As’ then in the box select the icosphere we created earlier.

Now as you play the animation (Space or Alt+A) you will see your sphere spitting out icospheres. If they are too small or too big then you can use the the ‘Scale’ option to further change their size.
Particle Settings
Now the important part. The particle settings. You can tweak these as you like, but these are the settings I found tickled my fancy.
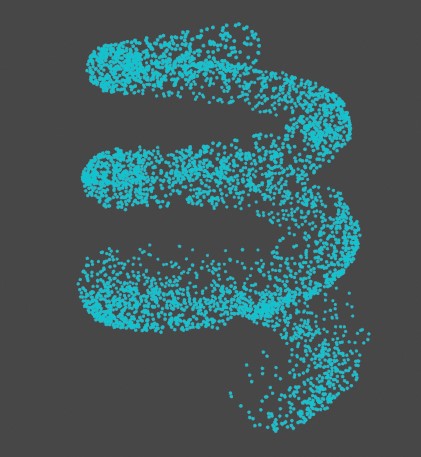
The number of particles varies depending on what you are looking for, I like between 1000 and 10,000 depending on what effect I’m looking for. Lifetime should be set to the same the time it takes for your curve animation to complete if you want the entire spiral to be visible in the end.
Under Velocity I turn off everything and then add a tiny amount of Tangent (0.05m/s). This disperses the particles slowly outward from the emitter.
Then the most important part, adjust Gravity in the field weights. If you want the classic sparkle spiral then turn Gravity off completely. You’ll get the following effect.
Turning gravity up will cause the particles to fall (as you’d expect), so use this if you’d like older particles to start falling to the ground.
Also turn off ‘Show Emitter’ under the ‘Render’ area. You can also un-check it under ‘Viewport Display’ if you’d like it hidden in the viewport like you see above.
As I said these are the settings I like, you can experiment to find what tickles your pickle.
Particle Material
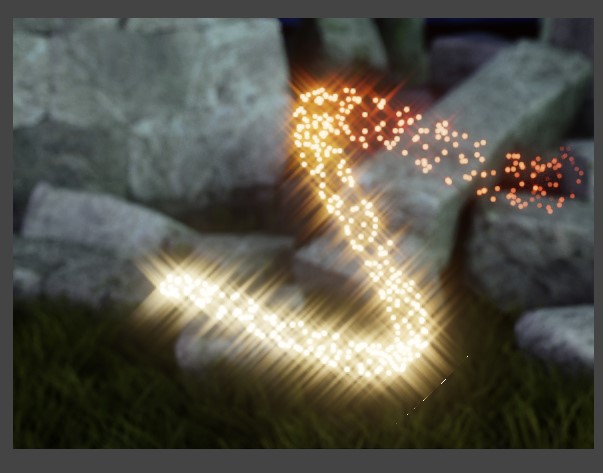
Your particles will inherit the material of your icosphere so the easiest way to do this is to simply select your icosphere and add a material. I recommend a shader that produces a lot of brightness, like an emission shader.
Having it produce a lot of brightness is important because we will be using the compositor to make things look even better next.
Composting
This is the part that makes the particles look like sparkles. After you have rendered (or before if you like) change a viewport to a compositor. Then add a ‘Glare’ node between the Render Layers and Compositor nodes. To get a ‘star’ effect change the type to simple star and adjust the settings as you wish.
If you wish to use other nodes you can do so by setting mix to 1 and then using a mixRGB node set to ‘add’.
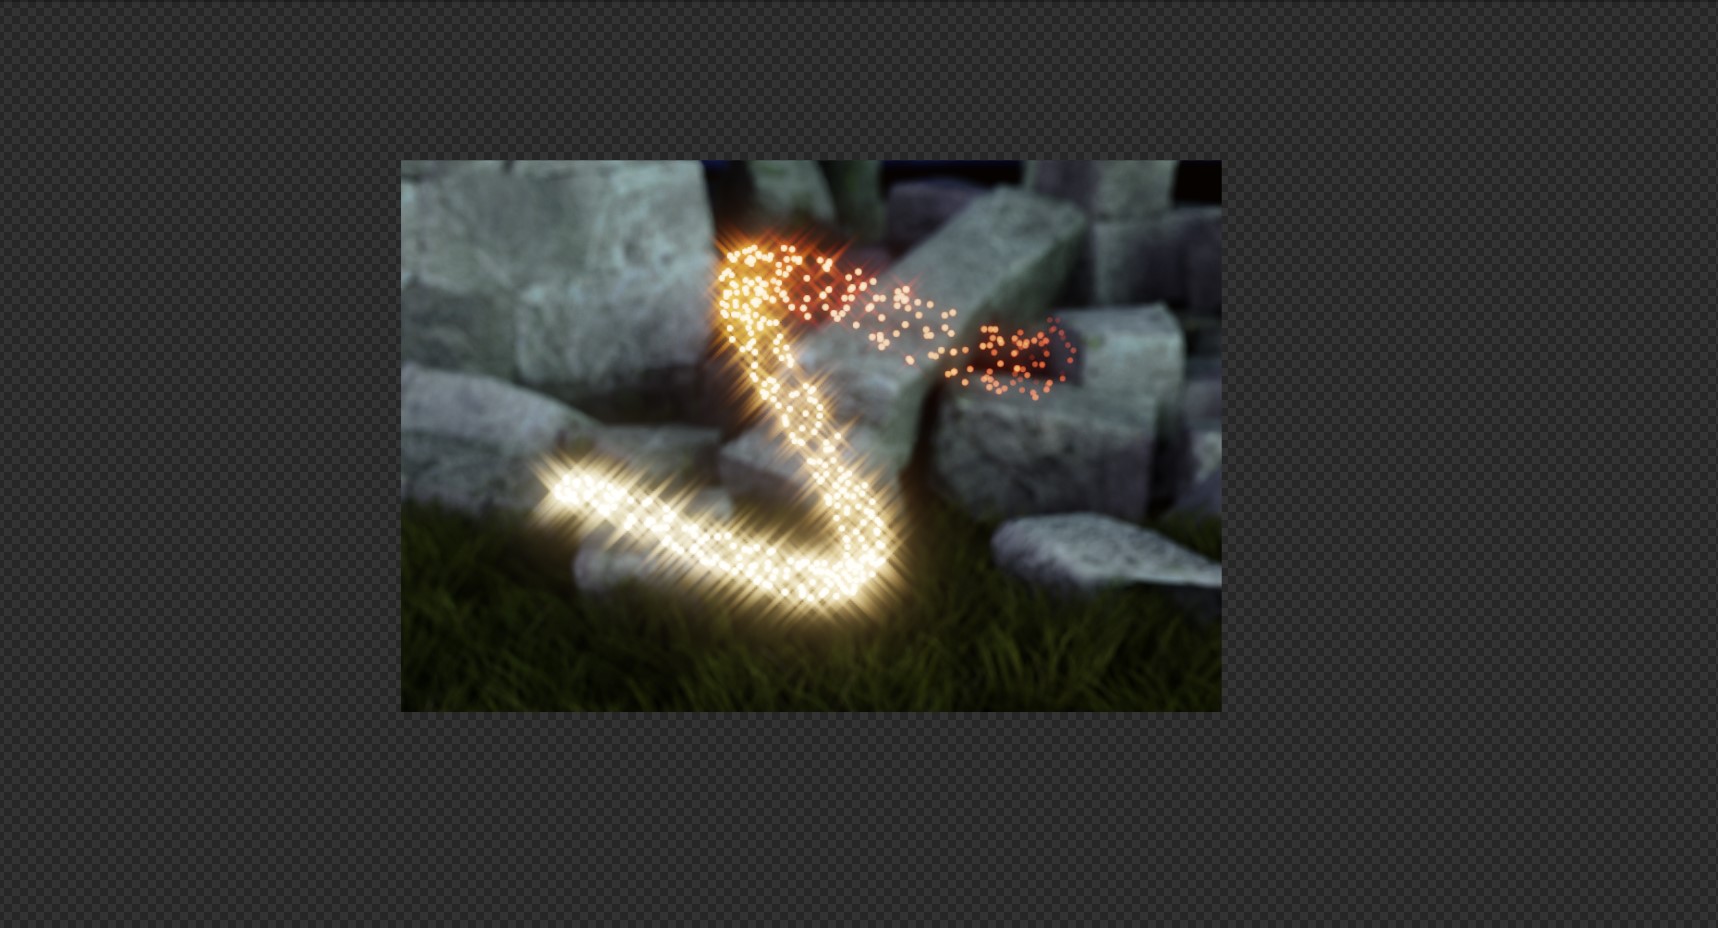
That’s it, you are all done. If you use these steps you can get results like from my NSFW Halloween special. I can’t post it here, but here is a SFW snip from it showing the particles.
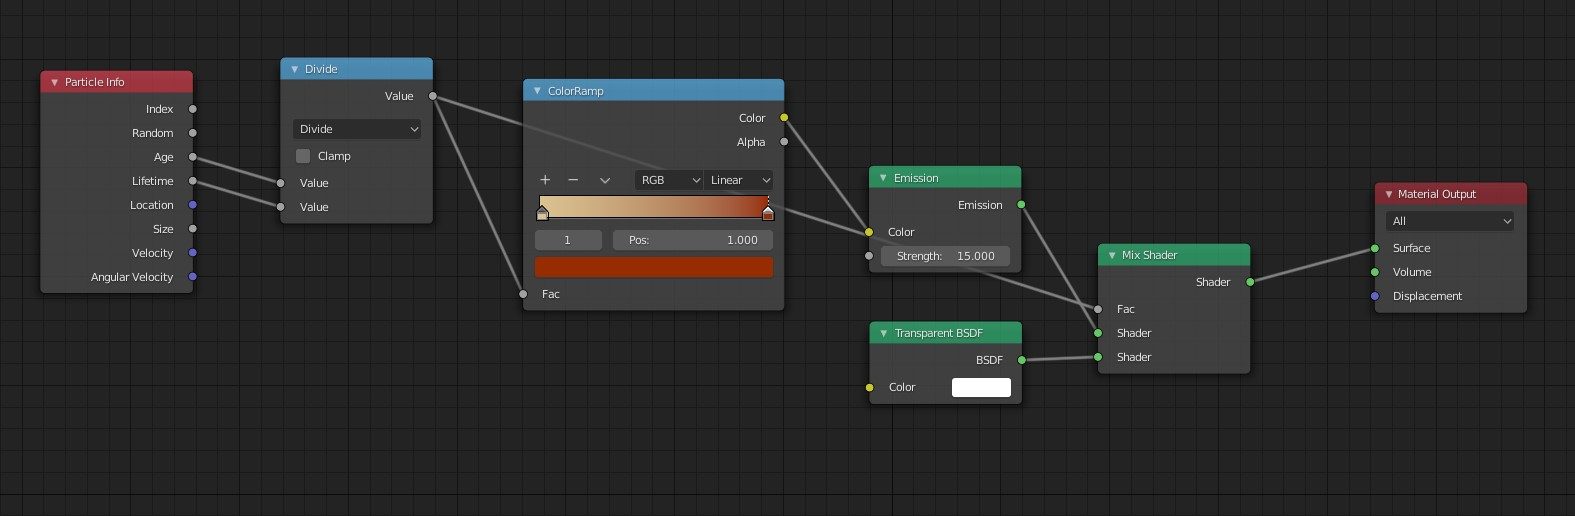
To get the color change and fading effect you use the particle age & lifetime to modify the shader. Here is the shader for you. Hope it helps and inspires.
That’s about it. Hopefully this helps and while this article was about making a ‘magic spell’ effect you can really use these steps to do anything with particles.
If you make anything cool feel free to tag me on Twitter @NabesakaRenders. Remember my Twitter is extremely NSFW so please don’t head over there if you are not up for seeing adult content.
Be First to Comment