The very first Daz tutorial I published here was how to make morphs for your character, but I was recently asked how to make morphs for clothing. Specifically clothing they had bought or downloaded.
To be honest to process is almost identical, however I wanted to cover it again because there are some differences and a few extra things to consider.
Why Make a Custom Morph?
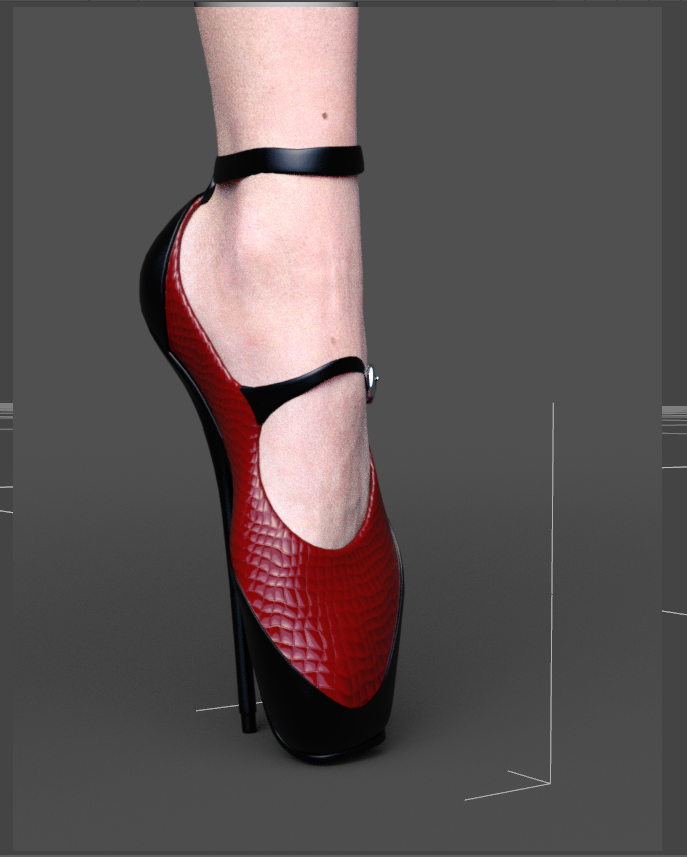
For this example I will be using SynfulMindz Masyn Ballet Shoes. I used them in a recent NSFW render. In this case I will be making a custom morph to fit the shoes a little better.

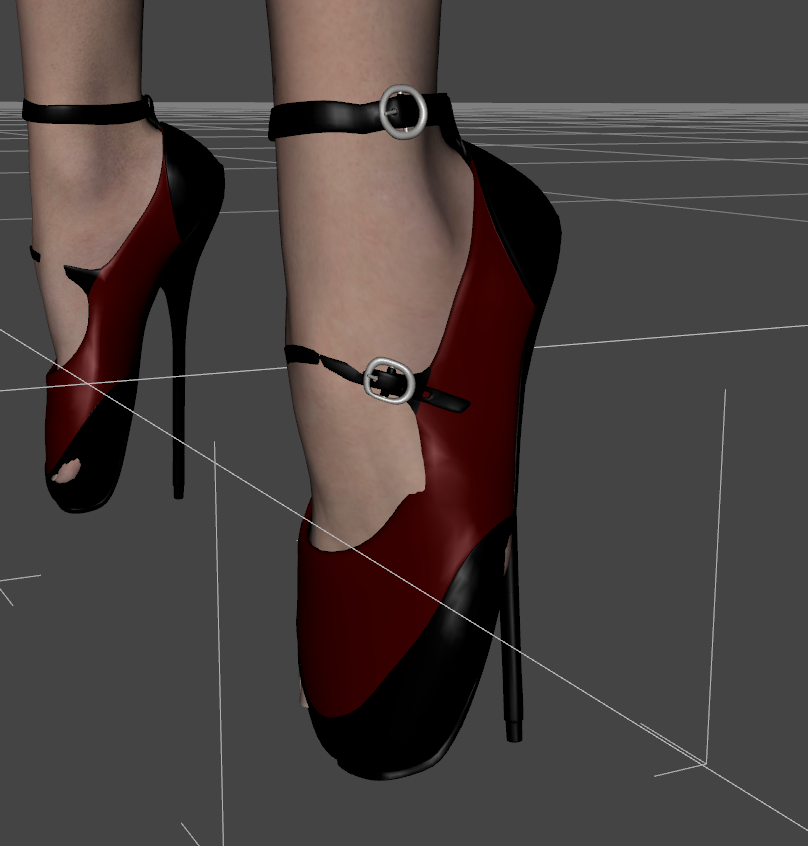
SynfulMindz did a great job of providing a multitude of corrective morphs you can use, but as you can see unfortunately when you use a foot morph like ‘Real Feet’ the morphs just aren’t enough in some places.
When this is the case I like to dial all morphs to 0 and make my own morph to help fit the feet in better.
Exporting The Clothing
To export the clothing is relatively simple. First make sure you have your character wearing the item of clothing either in default A pose or if a pose is provided, like for shoes, then make sure that is applied.
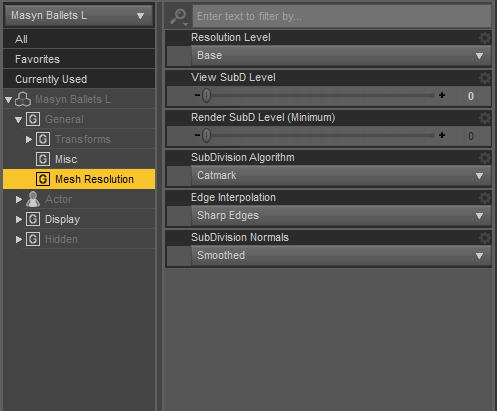
Now make sure the clothing is set to ‘base’ resolution and has no subdivision levels. If no subdivision is applied you won’t need to do this step.
Important
If you are working with shoes and have applied morphs to Genesis 8 you may want to show hidden morphs on the shoes and turn the transferred morphs to 0. This restores the shoes back to their original shape.
Hide any other models except the one you wish to export. In this case my shoes are two separate items so I will export them one at a time. If your shoes are 1 item then you will only need to export once.
You will also probably want to export your character so you can fit your clothing item to them. Follow the same steps for this, change the resolution to ‘base’ and reduce subdivision. Then export.
When exporting choose to export as a Wavefront OBJ. In the export options you can try choosing your target 3D Modeling program from the list. I wouldn’t recommend that for Blender though as it doesn’t work correctly. Instead choose the Daz 3D preset and untick “Write Surfaces” , we won’t be needing them.
Top Tip
Before exporting remember to also hide any fibermesh brows and eyelashes if your character has them.
Creating The Morph
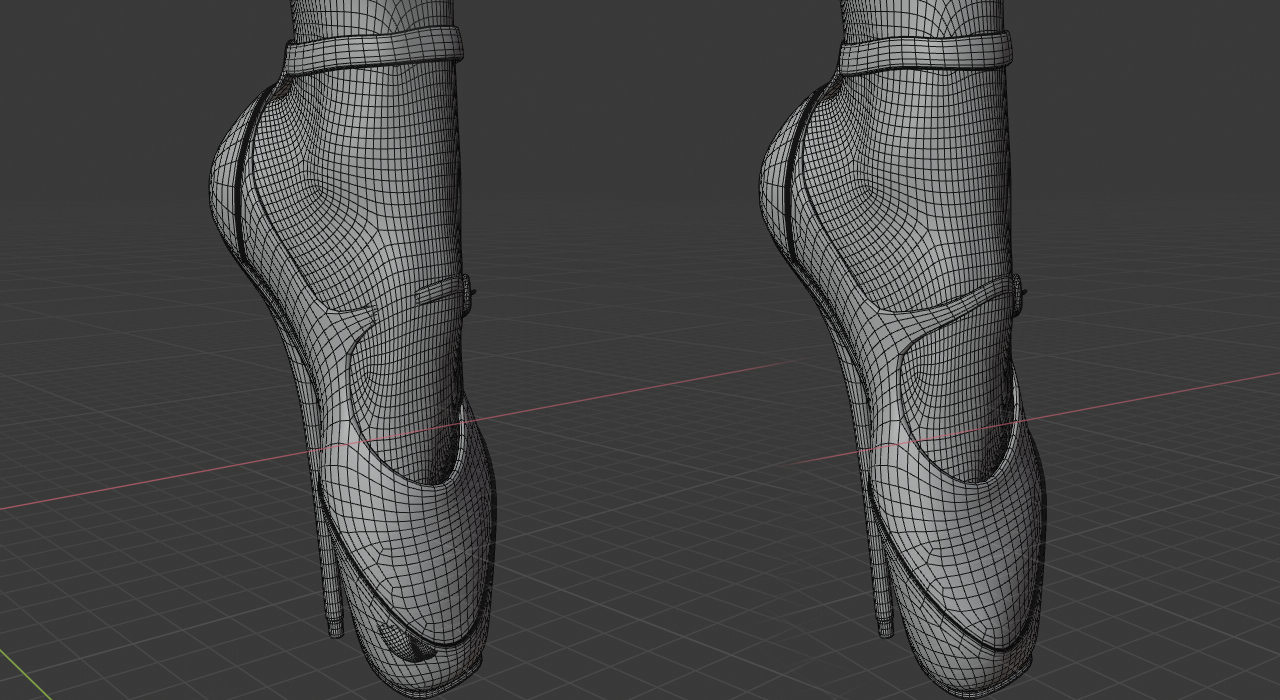
Now we get to the fun part. Creating the morph. I’m going to use Blender 2.8 RC1 for this, but you can use any modelling application that can edit an OBJ without deleting or adding to the mesh. I will give general instructions for Blender here, but the general steps should transfer to whichever application you are using.
First import all your OBJs. In my case that is both shoes and the character. When importing make sure ‘Keep Vert Order’ is selected. Vertex order is very important when making Daz morphs so if you are not using Blender you will need to find the equivalent setting in your 3D program.
At this point I like to apply a Subdivison modifier to the character and, if it had one, the clothing. This makes the mesh appear closer to how it will look in Daz when the morph is applied.
Now is the time to make your modifications. Remember that there is 1 simple rule and that is you cannot delete or add to any part of the mesh. You can only move it. In Blender your main friends are proportional editing and sculpting (with Dyntopo off).
In this small video you can see an example of how I adjusted the mesh using Blender’s proportional editing tools to eliminate the poke through.
As you can see I have adjusted the mesh to correct any foot poke through caused by the Real Feet morphs. There are some extra fixes I could add like straightening up the ankle strap and the foot strap but this should be fine for the tutorial.
Exporting and Applying The Morph
Assuming everything has gone well with making the morph, this is the easy part. Select your object in Blender then export as a Wavefront OBJ.
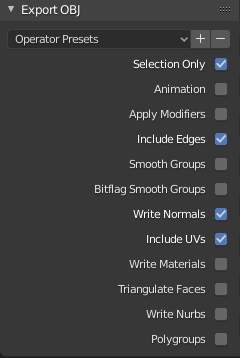
In the export options check ‘Only Selection’ and uncheck ‘Apply Modifiers’ and ‘Write Materials’. You don’t have to uncheck ‘Write Materials’ but it prevents a pointless MTL file from being created. All other options are at their defaults.
Back in Daz select the object you morphed and open up Morph Loader Pro. That’s Edit -> Figure -> Morph Loader Pro. In the box choose the scale you exported at, if you used Blender that should be ‘Daz Studio’. Click ‘Choose Morph Files’ and select the OBJ you exported.
On the item that appears click the twirler (triangle) to open the options. Change the name, Right click ‘Property Group’ and select a group that makes sense or create your own. Right click ‘Reverse Deformations’ and choose ‘Yes’. Right click ‘Overwrite Existing’ and choose ‘Deltas Only’. Now press Accept.
If in the box that appears it says ‘Created morph Successfully’ you are good to go. If it mentions a geometry mismatch you will need to go back and make sure you did not add or delete from the mesh in Blender.
If you need to make any modifications to your morph you can make your edits in your 3D program and then export the OBJ again. If you go through Morph Loader Pro again using the Exact same name and settings it will adjust the morph instead of adding it again.
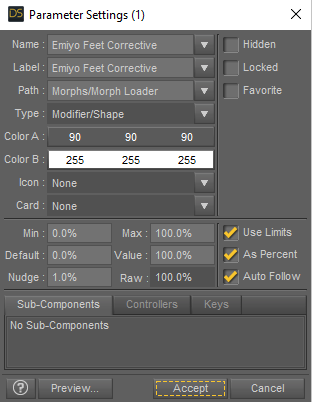
If you find your morph you can click the cog icon to open the parameters to change any settings. In this case I changed the min percentage to 0 so the slider will move from 0% to 100%.
Finishing Up
Custom morphs will only be available on the item in the saved scene file. If you wish the morph to be available whenever you load the clothing item into the scene you can save it as a support asset. That is File -> Save as -> Support Asset -> Morph Asset in the box that appears add a vendor name and product name, then select only your custom morph. You may also wish to choose a different library to save in to keep it separate from your bought products.
Final Tip
A small final tip. When creating your morph the morph loader compares vertex positions when applying it to the model. This means if you plan to reuse your morph in other scenes you must save it as a Morph Asset.
If you, at alter date, try to reload the morph using the Morph Loader and the clothing is in a different position to when you originally exported it, the morph will move the clothing to the position it was located in when you exported it.
If you are applying it to a character and they are in the default A pose this usually isn’t a problem, but it certainly can be for clothing which is often applied after posing a character by many artists.
That’s about all there is to it. In this case I was making a ‘corrective’ morph, but you can make any kind of morph you wish.
I hope this guide was helpful in some way. If you have any questions or problems please feel free to ask in the comments.
Would have been perfect, but you did not include screenshots for the full DAZ3D export – so I’ve funneled around for a long time not know what to select to match up.
Hi Todd,
I’m unsure what you mean by ‘Full Daz3D Export’? I have mentioned all the settings that matter. Subdivision set to 0, resolution set to base, turn off all morphs (including transferred hidden morphs) and export as a OBJ file.
In essence the model must be fit to the model, but have no other modifications when exporting.
Hi, thank you for the tutorial. I have a question. I created a wind morph (skirt blowing right) and everything works fine until I apply this new morph to my character in different poses. It was obviously created in the T-pose. Then poke-through starts our not covering certain body parts. How do I get a universal morph that will work on all characters and in all positions? I hope it makes sense what I am trying to say.
Hi,
Cloth physics, in Daz’s case DForce, is the only real answer.
As far as I’m aware no single morph will work for all poses. Think of it like modelling using clay. If you sculpt a skirt for a statue that is kneeling down that same skirt would not fit correctly on a statue sitting on a chair. You would need to re-sculpt the skirt to fit the new pose.
The same is true here. To avoid it you’d have to make the skirt out of real cloth. That is what DForce aims to do.
Thank you very much! Solved my problem.