
This tutorial has probably been done a thousand times, but I’m going to give my spin on it. So strap in, buckle up, and let’s get going with how to get a SFM model into Blender.
Note
While I would recommend you have knowledge of the viewport, installing add-ons and a basic understanding of Nodes I will try to make things as beginner friendly as I can.
REDxEYE Source Tools
To make things simple we are going to use the io_mesh_SourceMDL package from Github. This is a great plugin we can add to Blender to allow us to import MDL files without using Crowbar.
Head over to the Github page for io_mesh_SourceMDL and download the latest release.
In Blender pull up the User Preferences and hit the ‘Install Add-on from File’ button and find the zip you downloaded. Ignore any messages saying it may crash Blender, and tick the box to enable it. Remember to save your user settings if you want it to stay enabled so you can use it from start-up.
Extra Info
REDxEYE has an excellent blender add-on called SourceIO which will do all of the stuff we are about to use VTFEdit for, but it only currently works (as far as I know) with Blender 2.8 and I want to keep this guide about 2.79 until 2.8 is released.
VTFEdit
We will also need a tool to extract the textures for our SFM model. The Blender plugin cannot pull the textures so we will use VTFEdit to get them.
I use the archive version because I can place it wherever I like, I keep it in a tools folder with my other 3D modelling related files.
POD 042
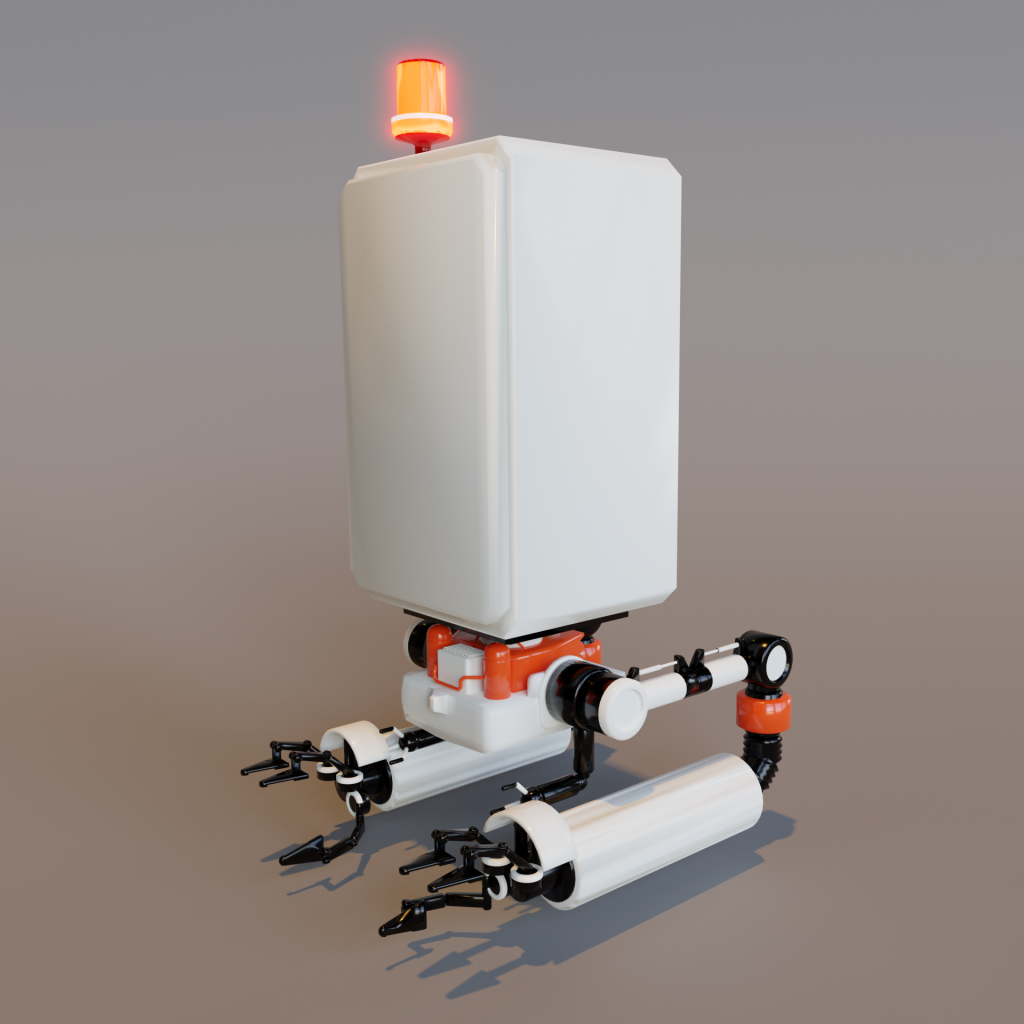
In this tutorial I am going to use POD 042 from Nier Automata to show you how to import an SFM model.
It is an ideal model because it has some simple rigging, and a few materials that should be a great way to start out. If you want to follow along you can grab the POD 042 model from SFMlab.
Importing The SFM Model
Extract the zip somewhere. I suggest keeping things organized early on, if you get addicted and do a lot of these you’ll end up with a mess of files pretty quickly.
Now in Blender make sure you have a clean scene, if not select all and delete. Then head to ‘File’ -> ‘Import’ -> ‘Source model (.mdl)’ and find the .mdl file.
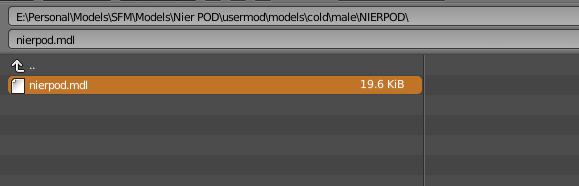
If you are using a different model you can use the name or a little trial and error to find the correct model, if there is more than one for you to choose from.
In this case our model is gigantic. you can keep it at this scale, or you can select the armature and scale things down. In this case I’m going to scale down to around 0.25 by pressing ‘S’ then ‘0.25’ then ‘enter’.

As you can see above POD is missing its textures. Let’s fix that.
Extracting Textures Using VTFEdit
First open up VTFEdit. If you have trouble opening it, note that you cannot run it from inside the ZIP (at least I couldn’t), and you may need to install NET Framework 2.0. In Windows 10 NET Framework 2.0 is found in “Turn Windows Features On or Off”.
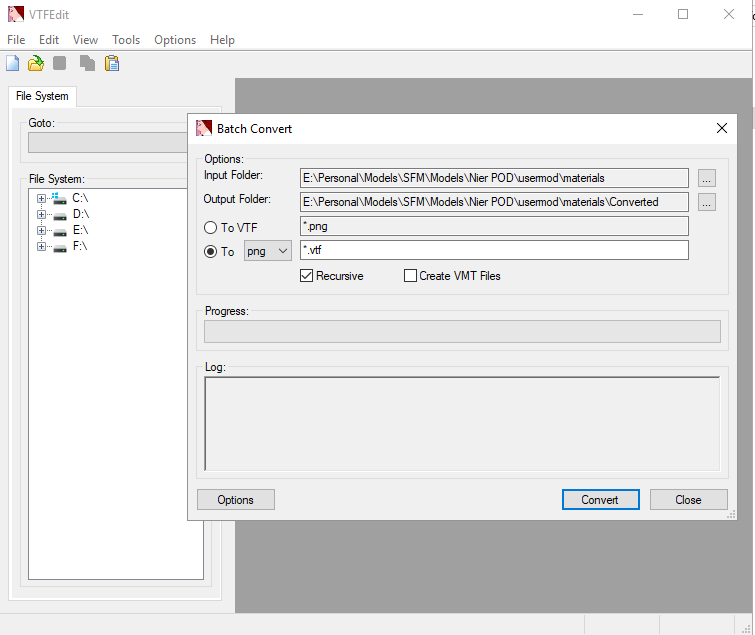
Once VTFEdit is open click ‘Tools’ -> ‘Batch Convert’. In the window that comes up click the box next to ‘Input’ and find the directory just before all of the VTF and VMT files. That is generally a folder called ‘materials’.
Pick an output folder. I generally just make a ‘Converted’ folder inside the aforementioned ‘materials’ folder.
Finally pick ‘To’ and choose ‘TIF’ or ‘BMP’.
Hit convert and wait for it to do its thing. Once done change your ‘To’ format to ‘PNG’ and run the convert again.
Both a TIF/BMP and PNG version are needed because sometimes the transparency in PNGs cause issues with normal maps, however we may need transparency for things like eyelashes and hair, etc.
Once done you can close VTFEdit as it has completed its job.
Changing The Environment Lighting
Before we get to adding the textures, let’s add an HDRI for some nicer lighting.
Click on the ‘World’ tab on the properties panel. Then click on the button to the right of ‘color’ and pick ‘Environment Texture’. You can then select an HDRI, there are some great ones completely free over at HDRIHaven.
Re-texturing The Model
Now to put the textures back onto our model. This part you can have plenty of fun with making your own materials, but I’ll show you how to add them using the VMT files as a guide for how they were used in SFM.
Keep the folder with your original SFM materials open in Explorer and a notepad handy. We are going to use that to read the VMT files.
In Blender open out the armature for POD by pressing the plus next to it in the outliner panel. The entries with triangles are mesh objects. Click on one, I’m starting with ‘big arm’ and then head to the ‘materials’ tab in the properties panel.
Our first material is called ‘black’ so let’s see what we can make. Split the 3D viewport and change it to the ‘Node Editor’. Click ‘Use Nodes’ on the material if needed.
Now in your explorer window with the VMT files open grab the one that has the matching name and open it in a text editor (notepad).
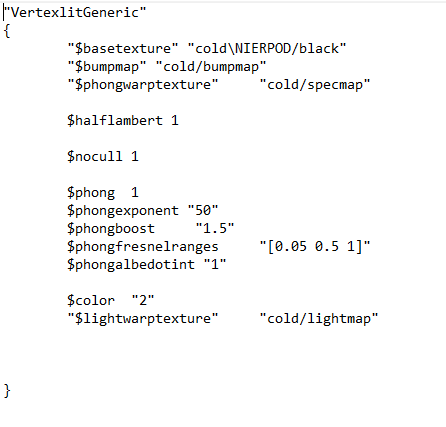
The important parts in this file are the texture paths. This let’s you know which textures you should load for this part when making the material.
Let’s see what this might look like in a Node setup. I will be using the Principled BSDF here, remember that it is geared towards realistic rendering, so if you are looking for anime or cartoon style rendering you may want to research a different setup using blenders other nodes.
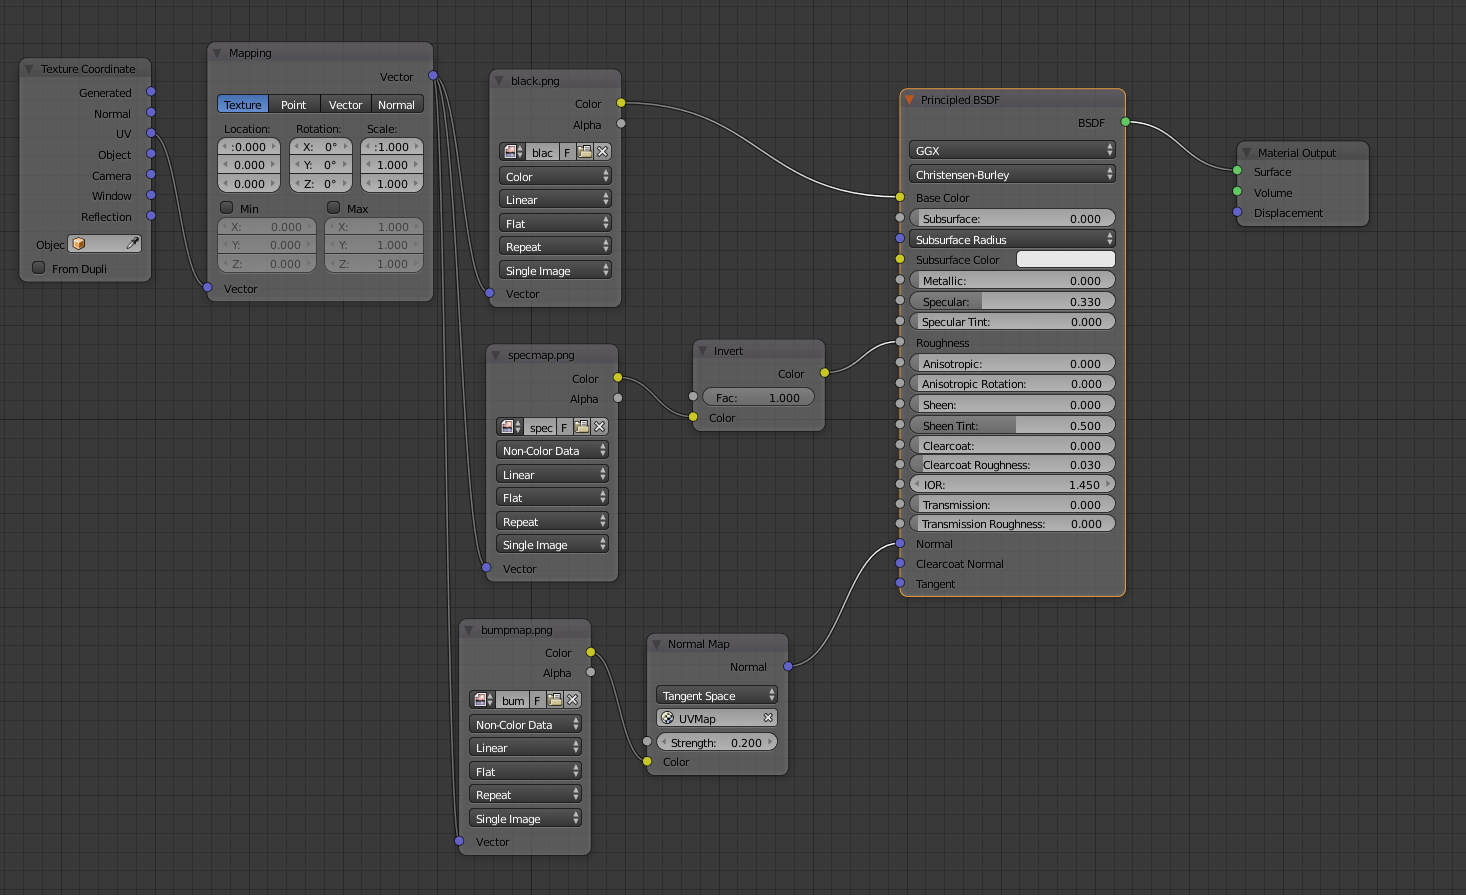
This is my version of the black material. Using custom roughness and normal maps can be better, but using the ones included by SFM can yield some great results.
Also note I have ran the specularity map through an invert node because it should be used as a roughness map in Blender.
The actual specularity value can be determined by using the following piece of math ((ior-1)/(ior+1))^2/0.08 where ior is the Index of Refraction for the material the object is made from. You can find a whole list of IORs on Pixel and Poly.
That’s all there is to it. Go through each material adding in any textures and maps, and using the other parameters to dial in the material to your liking.
The only other ‘tricky’ material on POD is the lights. Here is a quick look at that node setup.
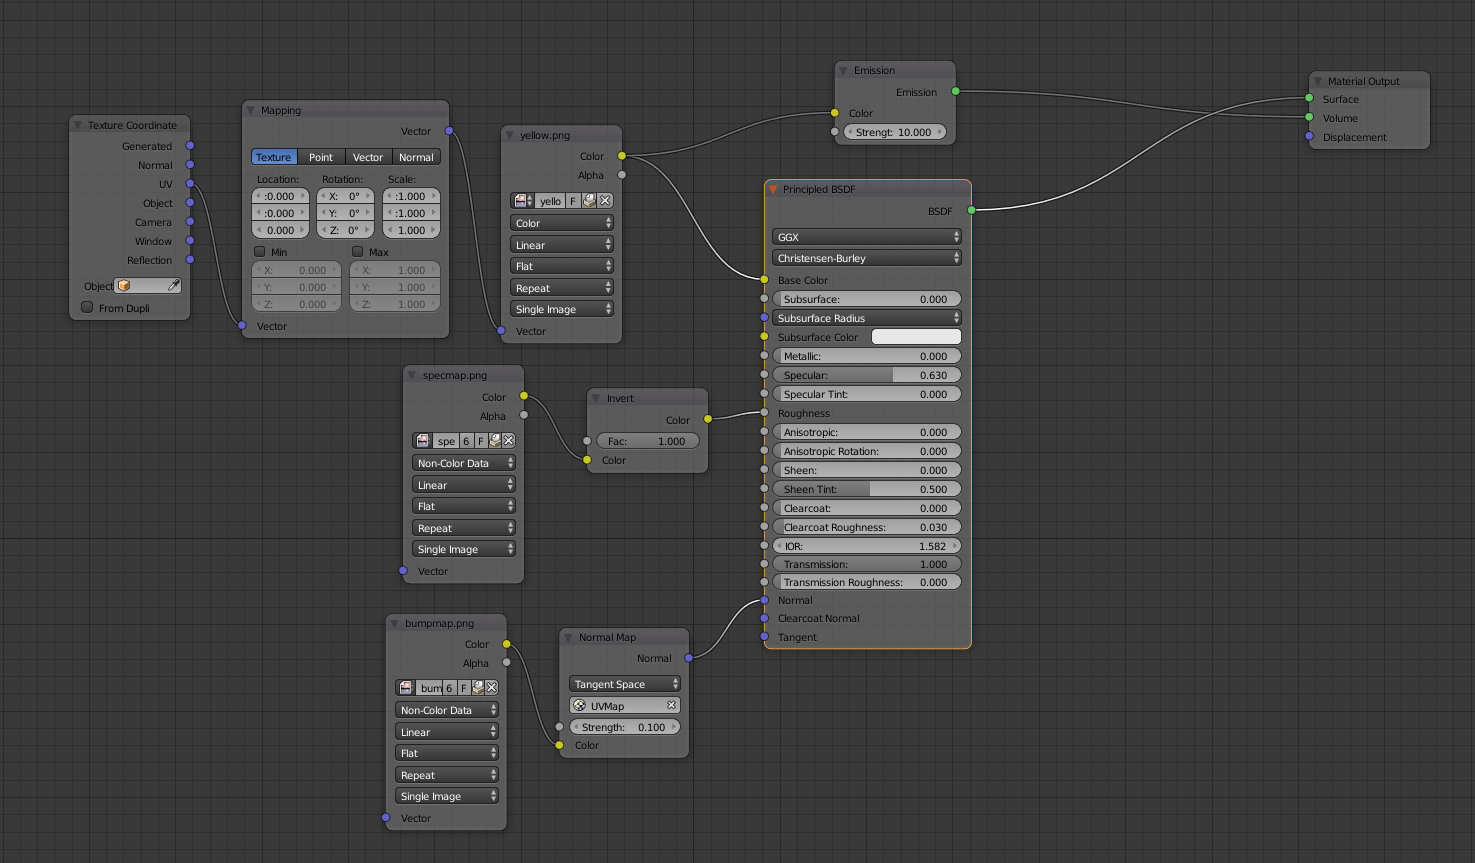
Here I decided to make the light on the top of POD a colored plastic using the Transmission option, and use an emission shader plugged into the Volume of the material to provide the light.
I’m sure it can be improved, but I’m fairly happy with the result after using compositing to add glow.
You can also turn up the metallic value if you’d like things to be made from metal. I believe POD is, but I personally liked the materials without it.
Another option is to just use a mix shader to mix the emission shader with the output of the principled shader.
Information
Blender 2.8, latest build, includes a new Emission option on the principled BSDF shader, so there is no longer any need to mix emission into it if you are using Blender 2.8
Complete!
This is just a quick look at how to import a SFM model and setup some basic materials for a model in Blender.
Don’t be afraid to investigate more though. If the model is a person you can try rigging the them using something like Rigify so you can make animations. If they are relatively low poly you can try to convert them to quads so you can use subD.
There are lot’s of possibilities and Blender is exceptionally powerful. Don’t be afraid to go forth and fail, it’s how we learn!
I have been looking for such an addon on 2.79 for a long time. Thank you so much !!!
This is so confused! what i need to do in the node editor? i don´t know how to put vmt files :(((
The VMT files can just be opened in a text editor. The only really important information in there is the texture path. If there isn’t one then the material didn’t use a texture and you’ll have to use your best judgement to make a replacement.
In the node editor you make your material. If there was a texture path in the VMT file you can load it in there and use it in your material. I don’t explain how to use the node editor here as I’m assuming a certain level of Blender knowledge.
I’d recommend Blender Guru’s tutorials on YouTube if you need a set of tutorials on how to get started, including using the node editor.
So I’ve installed this add-on today and the import model type does not appear for me.