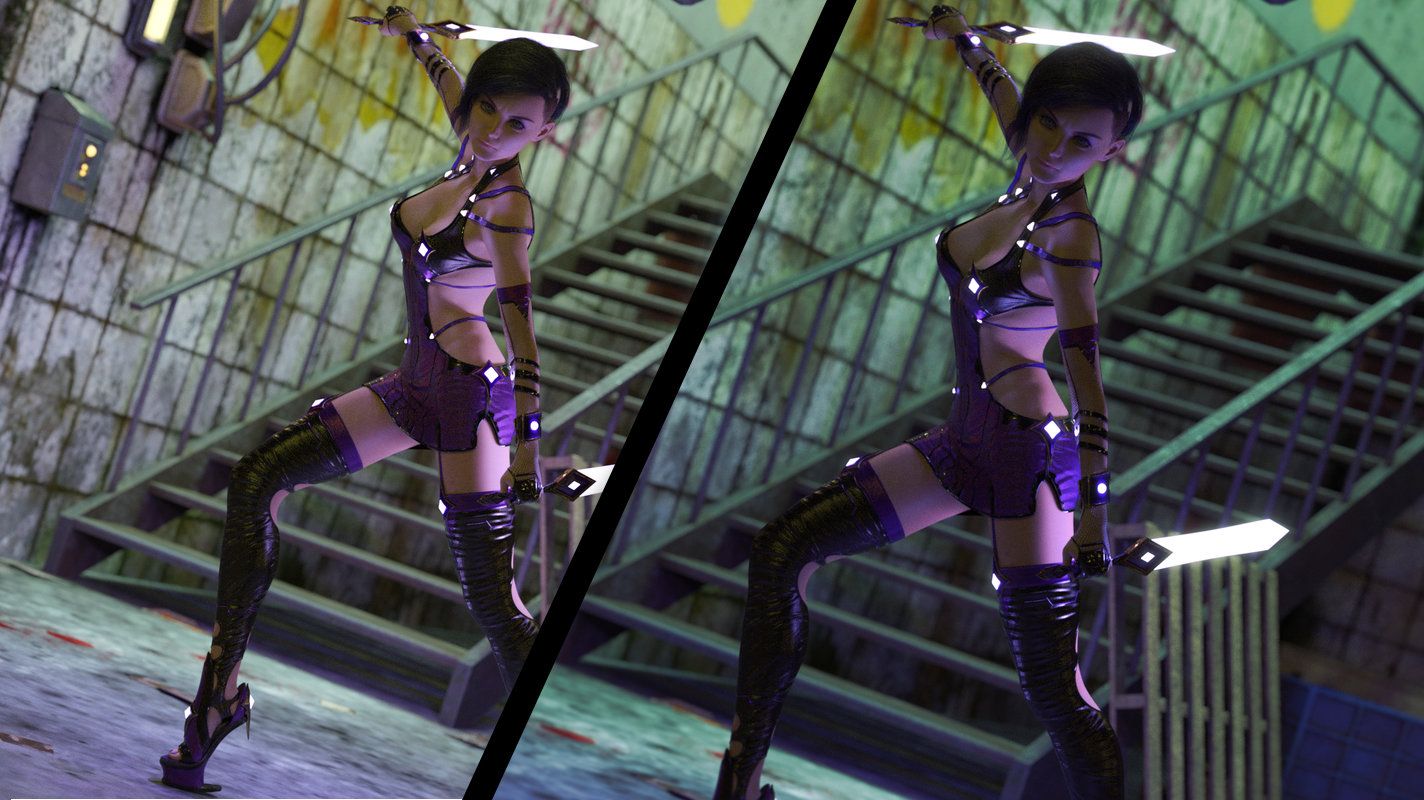
Bloom is something I’ve seen divide opinions. When used properly I think it can be used to great effect. It can, however, be horribly misused.
With all that being said, today we are going to take a look at how you can add bloom to your image using Affinity Photo.
Note
The general method used here should apply regardless of the program used.
Why Not Use iRay Bloom?
Since I can hear you shouting at your monitor, yes iRay does have its own built in Bloom. If used correctly it can be very effective and looks great.
That being said the settings aren’t particularly intuitive to use and I like the control allowed by post-processing. You can also easily disable the bloom without re-rendering if it doesn’t work out like you’d hoped.
Rendering The Emission Canvas
First thing you need to do is to render an emission canvas. You can do this before or after your main render. It will make no difference provided nothing in your scene has changed between the two renders.
First head on over to the ‘Render Settings’ tab and pull up the ‘Advanced’ tab. You should see something like the picture below.
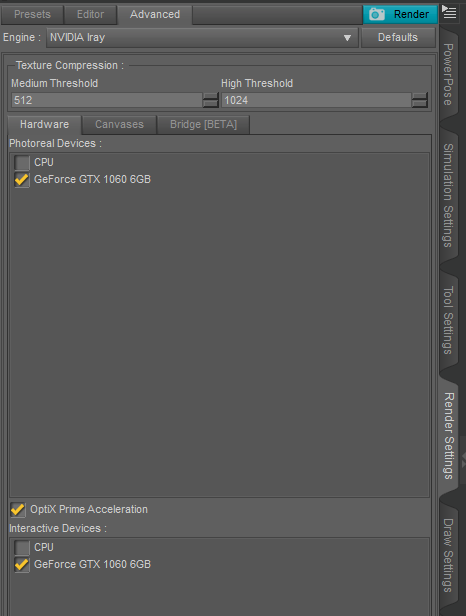
Once you have that switch over to the ‘Canvases’ tab. You need to add a new Canvas, you can name it anything you like or leave it as the default. You must also change it’s type to Emission.

Once you’ve done this just hit the render button. Daz will render only your emissive surfaces and will do so onto a black background. It shouldn’t take very long to render, but may still take a while in iRay setup time if you have a lot of textures.
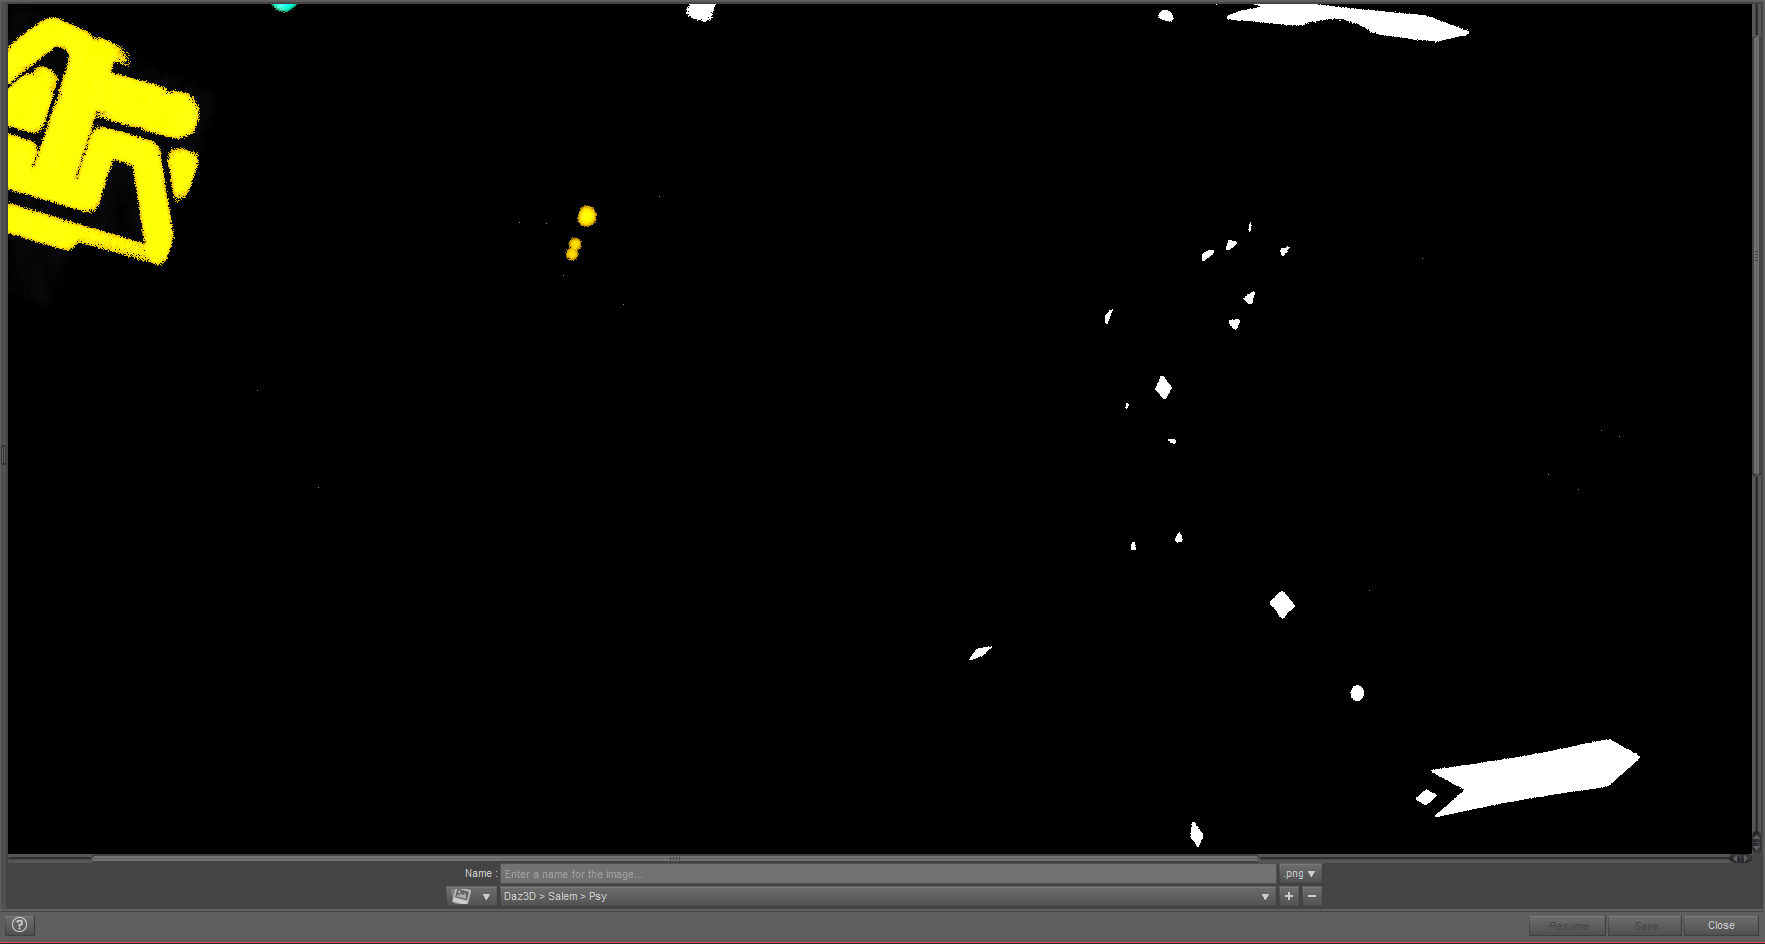
Once completed you can save your render out. I recommend PNG format.
You should know
If you are using iRay Canvases remember that Daz will save a canvases folder in the same location as you save the main render. The main Canvas files will be located there, generally in EXR format. If you do not save the main render the folder, and its files, are generally not created.
Adding Bloom With Affinity Photo
Now let’s move into Affinity Photo. This process is actually very simple. First load your main render and your emission render. You can use the EXR if you like, but a PNG version is fine.
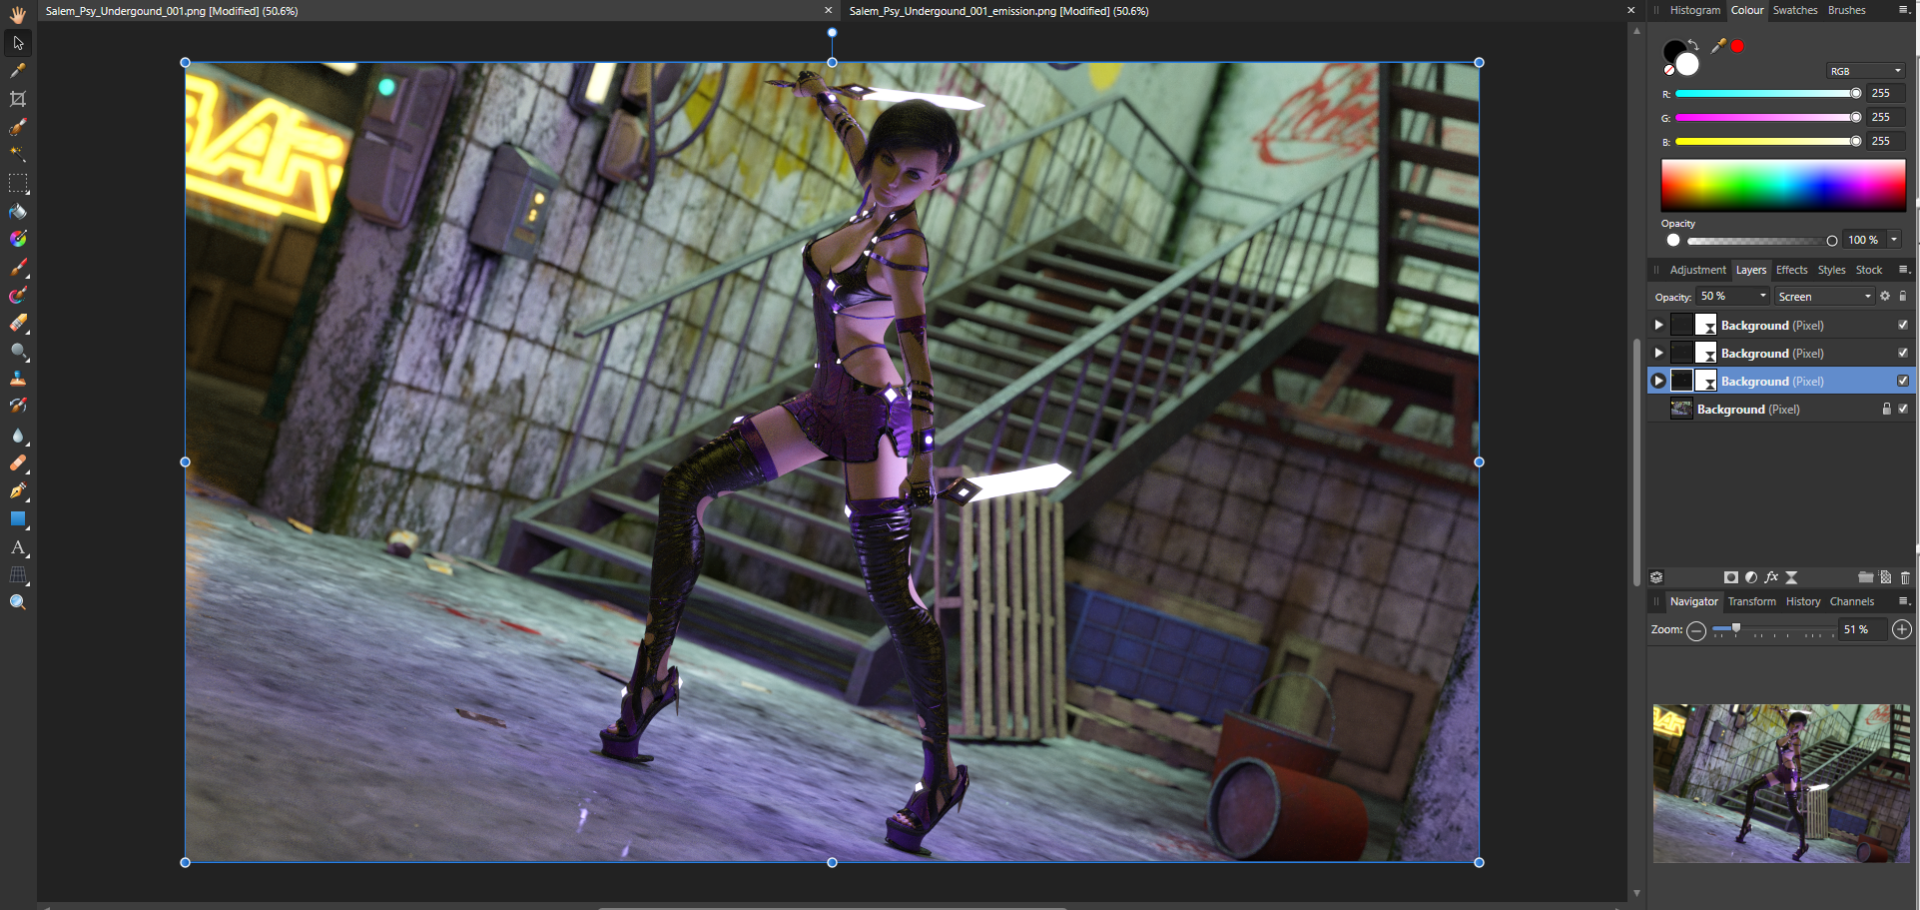
Copy the emission render and paste it as a new layer into your main render. You can also use the ‘Place’ command if you wish. Now set the emission layer to ‘Screen’ in the layer blending modes.

Now all you need to do is apply a Gaussian Blur to the emission layer. You can use ‘Filters’ -> ‘Blur’ -> ‘Gaussian Blur’ which is one time and destructive to the layer, or ‘Layer’ -> ‘New Live Filter Layer’ -> ‘Gaussian Blur Filter’ which is non-destructive and can be adjusted at any time.
I use around 5px of blur, but it will generally depend on the image and the effect you’d like to achieve.
Personally I like to stack the effect. Below you can see I have three layers. A 5px, 10px and 20px Gaussian Blur with a 50%, 25% and 15% opacity respectively (from bottom to top). I think this gives a better effect making the glow intense at the center but also providing a nice strong outer glow.
You can go crazy with the effect by mixing up different blending modes, using multiple copies to apply different strengths to different lights. It’s all up to you.
That’s all there is to it. I hope this tutorial has been helpful. If you have any questions you can ask them via the comments below.
Thanks very much for this tutorial. I can never get anything like the effects I want with the bloom effect in Daz Studio. This is so much better than fiddling with recalcitrant settings for hours.
Had a lot going on in life so haven’t had the time I would have like to keep up with my site, but I wanted to say thank you for the kind comment. It reminds me why I want to get back to making articles/tutorials to help everyone in their 3D journey even if I now spend more time in Blender than Daz.
You’re very welcome.
However, I seem to have run into an issue. My emissions canvas isn’t rendering just emissions, it’s also rendering the HDRI dome, and a black mask for the scene items, meaning I can see the outlines of scene items, and they get blurred along with everything else when applying the effect.
Any ideas?
I’m using DS 4.15 for this,
Well… You probably don’t need the help now but I still wanted to reply. Sorry, life got in the way I guess.
I don’t really use Daz for rendering too much anymore, but I guess you could do a render of the emission canvas without the HDRI enabled? Since the HDRI is technically an emission source I can see why it would be rendered as part of that canvas, although I might expect it to be separated out onto a environment canvas instead. Again though I’m more guessing based on Blender and other software at this point. I hope it helps somewhat though, if by any chance you are still looking for any info.