iRay has a lot of features including the ability to add Depth of Field with the camera. Honestly Depth of Field should always be added via the camera, if at all possible. However you might want more control during post processing or might want to try an unrealistic DOF a traditional camera cannot achieve.
Warning
There are some occasions where depth passes don’t work very well. This was the case in my recent Tea render. It did not work very well with the hair and bamboo leaves. In this case using camera DOF would be the best course of action.
I’ve seen a few tutorials out there that use a solo render of the main subject as a mask. The best way, in my opinion, to do this is to use the iRay canvases feature to produce a Depth pass.
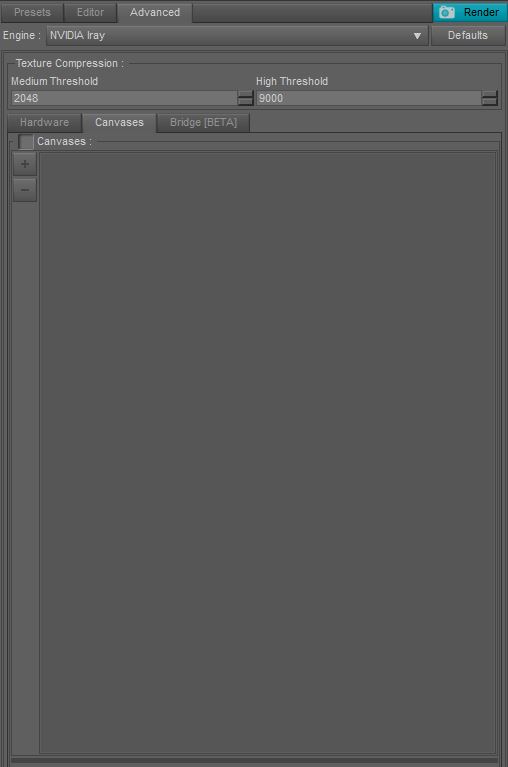
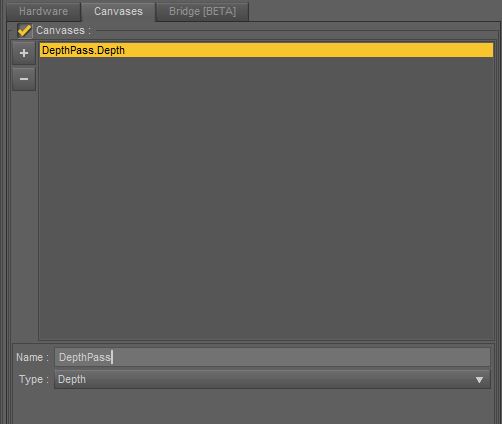
In the Render Settings panel you can find the Canvases tab under the Advanced tab. Tick the checkbox and then press the ‘+’ below. You can then change the Canvas name and also select a type.
Once you have set up your Canvases you can hit render. A depth pass renders fairly quickly so it is probably best to create it after your full render.
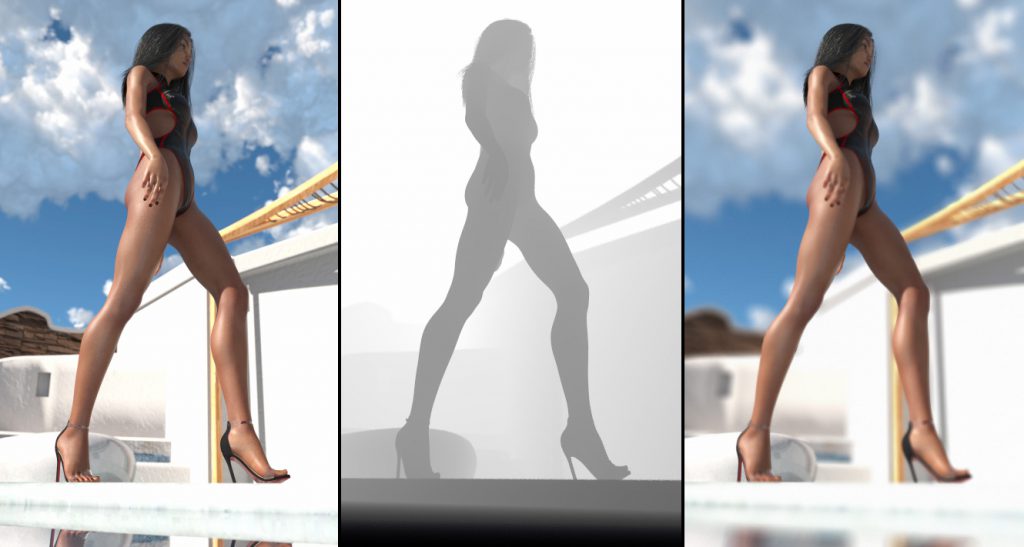
Once complete the render will likely be entirely white. Don’t worry that is expected. Now save this image wherever you’d like, it does not matter what file type you choose as we don’t want the render you are saving, instead we want the ‘canvases’ folder that Daz will create in the same directory as the render you are saving. In particular the EXR file.
Photoshop
It is pretty simple to get the EXR working correctly and use it in Photoshop. Simply open your render and the EXR file. The EXR file will be completely white, again that is normal.
Go to Image -> Adjustments -> HDR Toning. Select Equalize Histogram from the method list. You can select a different mode and make adjustments, if you wish, but this method will yield a grayscale mask that should match the depths correctly.
Now it is a simple matter of using the image as a depth map for Photoshop’s Lens blur filter. Simply copy the EXR image (Ctrl +A / Ctrl + C) then in your original render go to the Channels panel, add a new channel and paste into it.
Re-select the RGB channels and then go to Filter -> Blur -> Lens Blur. The channel you just created should be auto selected as the depth mask. Click in the image where you’d like the focus point to be and use the ‘Radius’ to change how shallow the DOF is. Change other settings as you like.
Blender
Blender is best used if you are desperately looking for something free or already know how to use the Blender Compositor. Beware, Blender is very complicated if you are going into it without previous knowledge.
If you are new to Blender you’ll want to swap to Composite workspace by clicking the button next to ‘Default’ at the top of the program.
Now you can add nodes to the top left area by hovering your mouse over the grid area and pressing Shift+A.
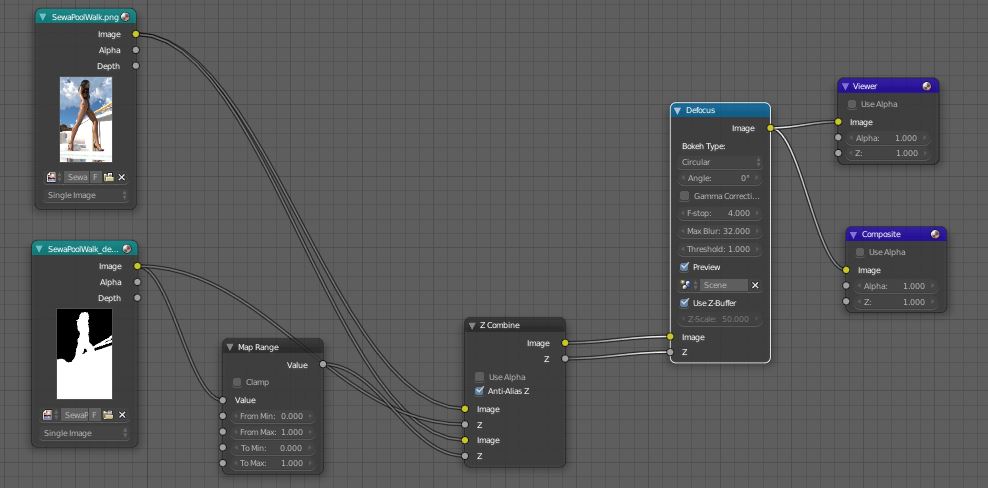
There are probably a few ways to do this, but this is what I came up with for my image.
You basically want to use two image nodes and load your finished render and the EXR file. Add a Defocus node and pass your EXR into the Z input and tick ‘Use Z Buffer’ and pass your final render into the image input. Then pass it out to a Composite node.
That is the simplest method and I could stop there, but it is important to understand what is happening. This EXR file doesn’t contain standard color information, instead it contains values that show how far away the objects were from the camera. This is why most image viewers show the image as completely white.
My knowledge of this is only based on my experience, if you know exactly how this works please do let me know in the comments. It seems that Blender will defocus anything with a value of 1 and leave anything with a value of 255 and above depending upon the f-stop set.
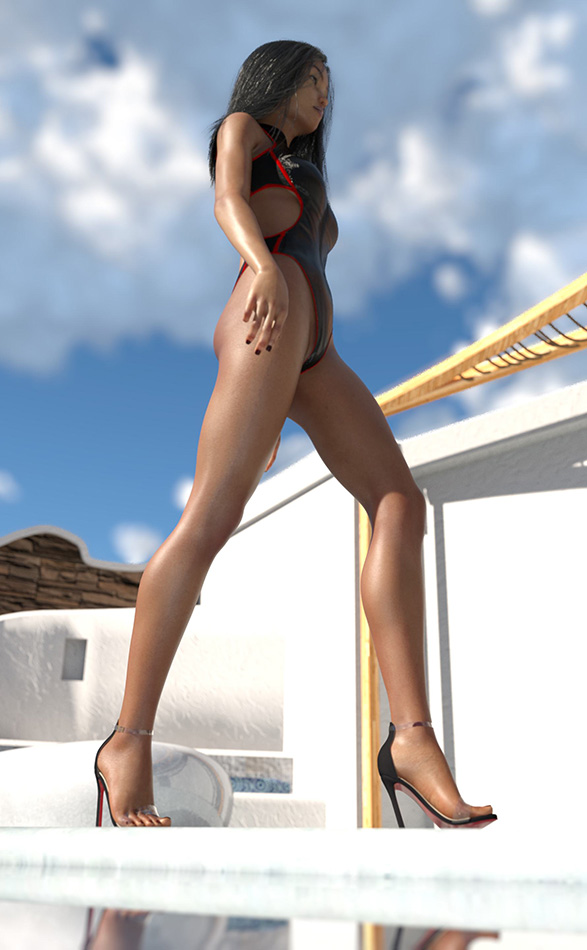
In the node setup I described above that means with the correct f-stop the girl is left in focus but the water is defocused, but I want the background to be defocused too which won’t happen because the value contained in the EXR for the background is a very large number.
To solve this I have passed the depth pass through a map range node. It appears that with clamp disabled this will leave all values intact except for the large value Daz gives to infinite distance. This is great for my purposes.
The other node used (Z Combine) combines the z pass information into 1 so it can be applied to the image. Here is the result from Blender.
If you’d like to render and save your image in Blender switch the bottom left window to ‘Render Result’, disable ‘preview’ on the Defocus node and hit the render button on the far right panel. You can press the camera icon if it isn’t visible. Make sure your resolution is set to 100% and matches your original image or it will only output the part of the image that fits into the size set.
You can then save your image by pressing ‘Image’ -> ‘Save As Image’ on the bottom bar of the viewport where your image was rendered.
That’s about it. I hope this has been helpful in some way. Photoshop is by far the easiest way to apply a depth pass to an image, however if you can master Blender’s Compositor it is immensely powerful!
Be First to Comment