I made a post a little while ago about how to use Metaballs in Blender to make a nondescript white fluid. Since then I’ve worked with metaballs a lot more and have come up with my own technique for making ‘fluids’. I was asked if I could share my technique, so here we go.
This is not a step-by-step tutorial and assumes you have decent knowledge of Blender and how to get around. Please check out Blender Guru’s videos if you need to learn your way around Blender.
Hey! Listen!
While I do use these techniques for NSFW purposes, it is perfectly possible to use this for other fluids. In my experience it is best used for thicker fluids such as honey, sugar syrups, even slime.
Metaball Settings
First up is the settings. Metaballs are unique in the settings they have available. For most purposes I use the following settings.
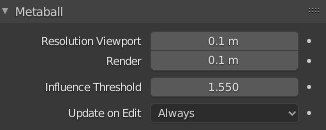
So that is Resolution at 0.1m and Influence Threshold at anywhere around 1.4 to 1.6 depending on your scene scale and the effect you are looking for.
Resolution is how detailed the mesh will be, for fluids this should be a detailed as your computer is able to handle. You can reduce the resolution in the viewport if needed, but 0.1m results in a very detailed mesh.
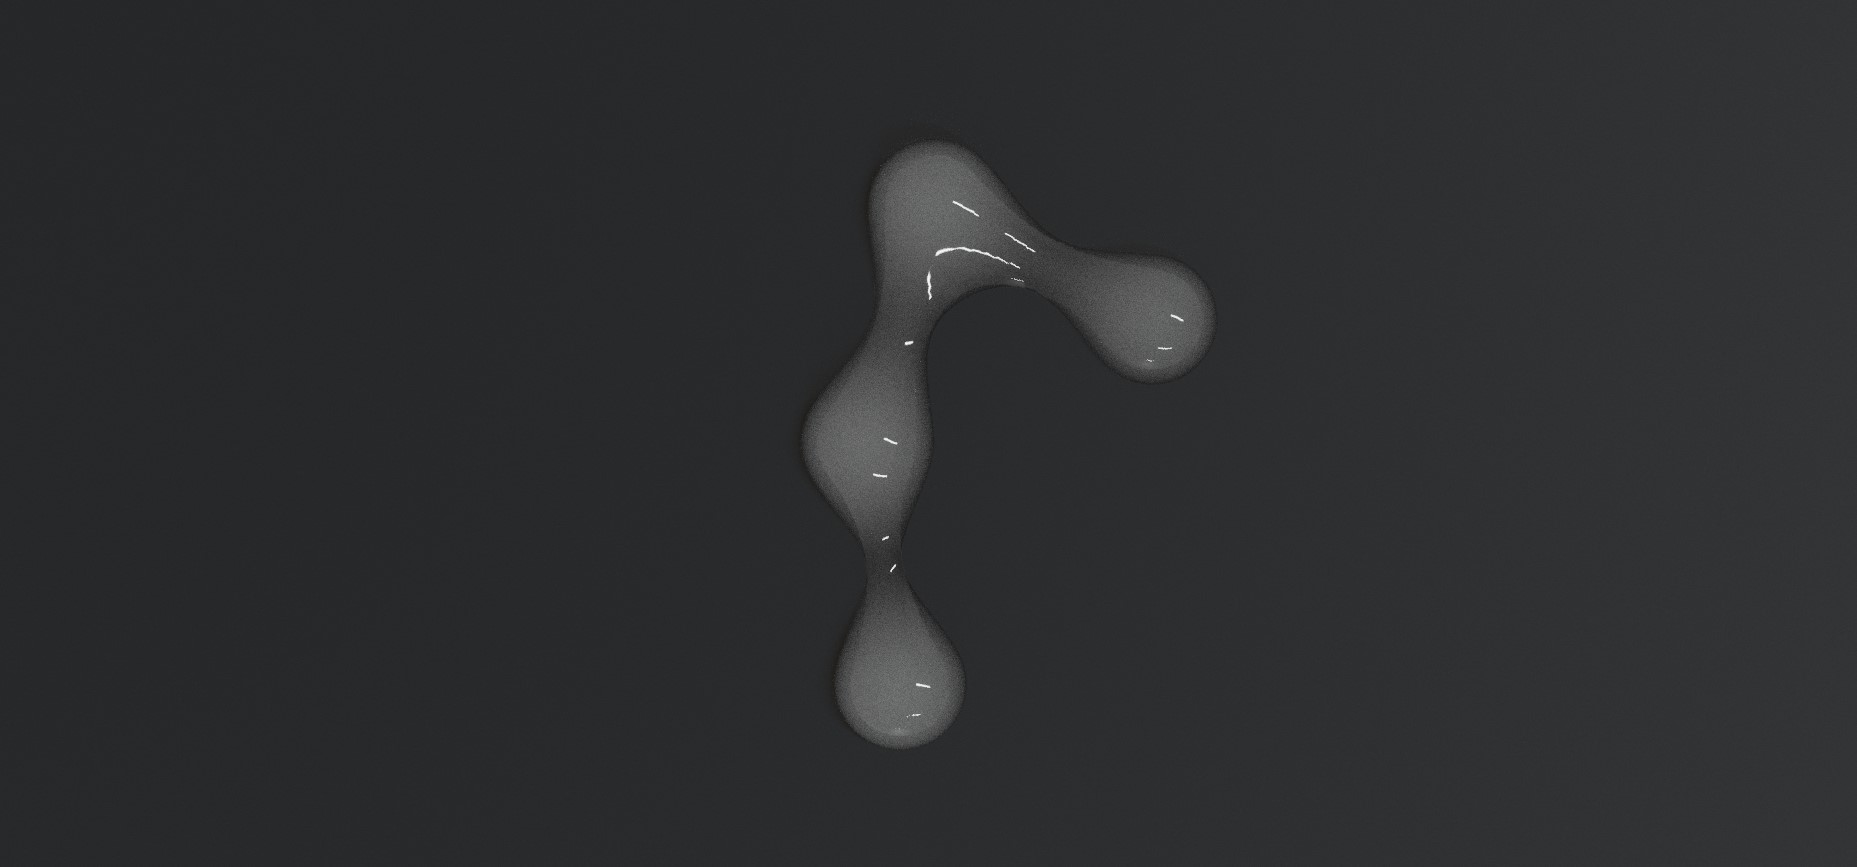
Influence Threshold indicates how much of an influence each metaball’s surface has on its neighbours. I have found having this around 1.4 – 1.6 allows you to get nice ‘stringy’ parts very easily by pulling two metaballs slowly away from each other.
Metaball Notes
Next an important note you should know about Metaballs. If you read my last tutorial you’ll know that Metaballs are not exactly your standard mesh. They like to try to merge with each other.
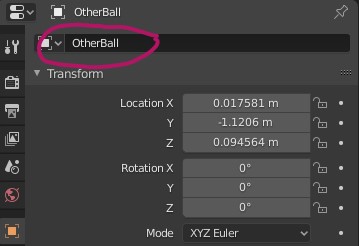
When you add a new Metaball object you’ll notice it is called MBall. If you add a second it will be called MBall.001 and you’ll notice it will interact with your other object. You might think that’s a little strange! Normally objects don’t interact with each other.
Metaballs are different. They have ‘Families’ and the name before the .xxx determines its family. If you want to have two Metaball objects that do not interact with each other you’ll need to add an Metaball object and then change it’s name. Changing the name in the Outliner seems to work fine in Blender 2.83+, but if it does not then try changing the name in the Object Data panel.
Metaball Placement
This one is tricky to teach. I have three words. References, references, references. Need some honey? Look at a lot of pictures of honey and how it lies on surfaces, runs off spoons, get some honey and play around with it.
Need a more NSFW fluid? Prepare to look at far too many pictures of stuff… Yes, that stuff. Look at how it gathers, how it drips, how viscous it is. How does it lie on surfaces, how does it ‘commonly’ gather, what shapes does it ‘tend’ to make. If you are able to produce it yourself, look at it next time. If not, then…. I’m sure someone will help you out. I won’t judge you, whatever floats your boat.
Serious Talk!
While I am joking around, please don’t go doing anything inappropriate. In this current world of weird crap happening left, right, and center I don’t want anyone claiming I was the one who told them to go harvesting male fluids.
Placement Tips & Tricks
I can help with some tips and tricks. First I advise organizing your fluids into sections. Use a single Metaball per section and add detail to it via edit mode. You can do it all in one Metaball (I’m incredibly guilt of that), but it can get difficult to select and edit things depending on how large your fluid is. In the end it is up to how you like to work.
The process is fairly simple. Move your metaball to the location you want to start, then in edit mode duplicate the metaball moving it as you go. Use scaling to make it bigger or smaller to create lumps or thin spots. Use the tips below for even more control.
Proportional Editing is a friend sent from heaven. Use it! Place your metaballs in the general location and use proportional edit to fine tune it. In most cases when one part of a fluid moves it pulls the rest of it too, this is what proportional editing allows you to simulate. The shortcut for this is o or you can use the Icon on the toolbar too. Use the mouse wheel after pressing g to change the influence ring.

Snapping is amazing. If you are placing a fluid onto a surface save your sanity and use snapping. That is the Magnet Icon (or Shift+Tab) in the image above. Use the drop down to the right of it to select a snapping mode, in most cases ‘Face’ would be best. This will snap your object to the top of whatever face is under your cursor. Then use proportional editing above to move the Metaballs up or down to make your fluid ‘appear’ thicker or thinner.
Intersection is helpful. The Metaball geometry will intersect surfaces, but in this case it is actually helpful. More about this when I talk about materials, but you can place more of the Metaball geometry above the surface for thicker areas and lower it for thinner areas.
Materials!
This one is dependant upon what you are trying to make. I am making NSFW fluids and as such this part will be showing a NSFW material. I will be refraining from mentioning the name & using a basic plane as a surface. This is less for my host and mainly for the sake of search engines.
First up the material. I highly, highly recommend the material pack on Smutba.se. There are 3 in there for EEVEE and 3 for Cycles. You are free to choose whichever you like, but my preference (for Cycles) is WO!262 and was the material I was already using after finding it on the YouTube video referenced on the pack’s page. Grabbing it from Smutbase is much easier than re-making it though.
There is a very good chance if you use the material that it might look too ‘transparent’. That is because, in most cases, you will need to tweak the volumetric density to be more suitable for your scene’s scale.
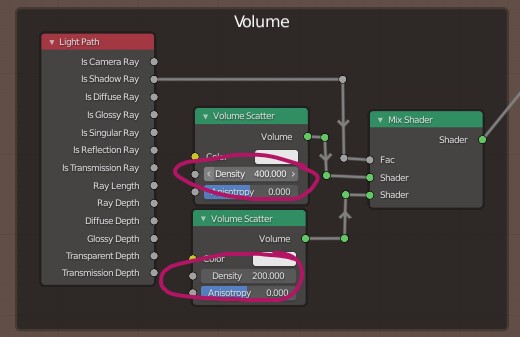
I find 400 and 200 to be about right most times but again it depends on your scene scale and how ‘cloudy’ you want it to look. This applies to some of the other materials in the pack too, so be sure to check the material out if they don’t look ‘quite right’.
In the above the volume scatter on the bottom is used if the ray that intersects the material is a shadow ray. From my limited understanding this is a way of controlling the volume in areas where shadows are. Please, if anyone with better understanding that part of the material reads this, feel free to comment below with a more detailed explanation, I’d love to know more about it.
I mentioned geometry intersection earlier. Having more geometry above the surface will make the Metaball look cloudy, having a smaller amount will make it appear more transparent. This is due to how the material works and I have found it looks a lot more realistic. Use it to your advantage.
Conclusions!
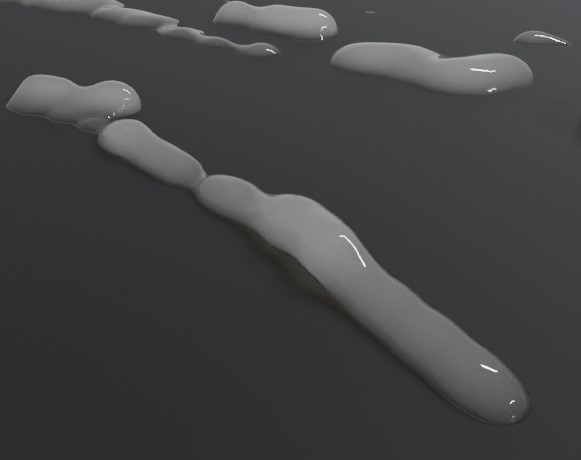
Metaballs are ‘fluid’ by nature so they are a sure fit to use for a more ‘controlled’ fluid. With a bit of patience, looking at a lot of reference and an awesome material you can get some truly amazing results.
I highly recommend the use of proportional editing & snapping. They make things so much easier.
Hope this helps. Again a lot of this is based on my own experience so I’m sure there are things that could be done in a better way, but please feel free to improve on these and share!
I may post a timelapse video of adding fluids at some point but it would only be available on Twitter as I keep actual NSFW content away from my blog as much as I can so Search Engines do not treat the site as Adult Content. Follow me on Twitter so you don’t miss it!
Hey, just found your website and it’s got a lot of good information on it. I was wondering if you could help explain some texturing processes for SFM-Blender imports for more complicated human models, mainly for the eyes and hair as I’ve had no problem with skin and clothing.
I’ve been trying to import SFM models into Blender for my own projects but in a lot of cases the eyes textures are totally off center and the hair has blocky black bits in it. I know nothing about texturing and I can’t find any active people with any tutorials on this kinda thing, not for Blender 2.8+ anyway. Thanks in advance and again great stuff here.
Thank you. It’s always appreciated. I’m certainly no Blender expert so it’s great to hear my ramblings are helping in some way.
Also apologies for this being so late. I’d stupidly misconfigured something and I hadn’t been getting comment notifications, but hopefully this is still useful.
Eyes and Hair can cause issues. It depends on if you are using EEVEE or Cycles but the most important part for both is to make sure you are using any alpha or opacity maps provided with the model. Either link it up the the Alpha pin or the factor pin on a mix node with a principled and transparency hooked up to it.
In EEVEE you also need to make sure you have set the Alpha type on the material, I use Alpha Hashed but others should also work.
In Cycles make sure you have given enough Transparency bounces the Light Bounces section. Above 16 should be enough but I use 24. I believe it depends on how complex the hair is.
I’m not 100% sure about the eye textures being off center. It could be there is a second UV map, in which case you would use a UV Map node to select the alternative map and pass that to the mapping node. It could even be something like the eyes are rigged but not centered when loaded. It’s difficult to say with that one as I’ve never seen it myself.
Hope that helps and again I’m sorry about the huge delay in replying.