Today we are going to take a look at how to use Spline IK, similar to my tentacle tutorial, but in a slightly different way.
The intended use for this was a penis, but since I try to keep adult content away from my website to appease my host I will be using a simulate. Hopefully it will get the message across. ( ͡° ͜ʖ ͡°)
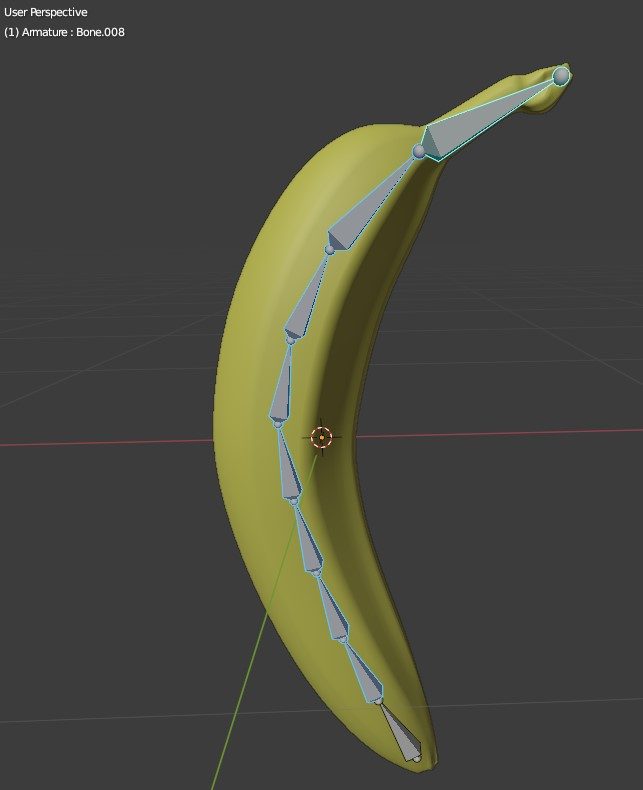
To keep things safe for work I will be using this Banana model from BlendSwap. I have pre-rigged it with bones. You will also need to have a pre-rigged model. The more bones you have the smoother things will look, but 6 or 7 bones should be good enough for most male appendages.
It is also good to have a basic knowledge of bones and Blender in general as I won’t be explaining every tiny thing as it would make this tutorial far too long.
Important!
You will get the best results if your object is straight. It is possible to rig curved objects, but is trickier.
The 3D Cursor is your Friend
We will be using a lot of the 3D cursor in this tutorial to help position things, so I want you to love the 3D Cursor. Become friends with the 3D Cursor.
First, with your armature in edit mode, select the head of your base bone. This is the first bone in the chain of bones you want to move. Then move your 3D Cursor to it with Shift + S then Cursor to Selected.
Move out of edit mode, use Shift + A to add a curve of your choice, I prefer Paths but you can use a Bezier too. Go into Edit mode on the curve and delete any vertices that appear before your bone. At least 1 vertex should line up with your bone thanks to aligning the 3D cursor to it.

Now repeat the process of aligning the 3D cursor, but with the tip of your last bone. Then in edit mode on your path/curve select the last point and use Shift + S then Selection to Cursor.
Hey, Listen!
You may want to align your path/curve to the second last bone. This will allow you to control the last bone separately. Great if you have a stem on a banana or the glans on a penis (it prevents distortion too!).
Now repeat those last steps 1 more time picking a bone base or tip as close to the center as possible. You can add more if you wish, but while you will have more control you will also have more to pose.
Spline IK Is Cool
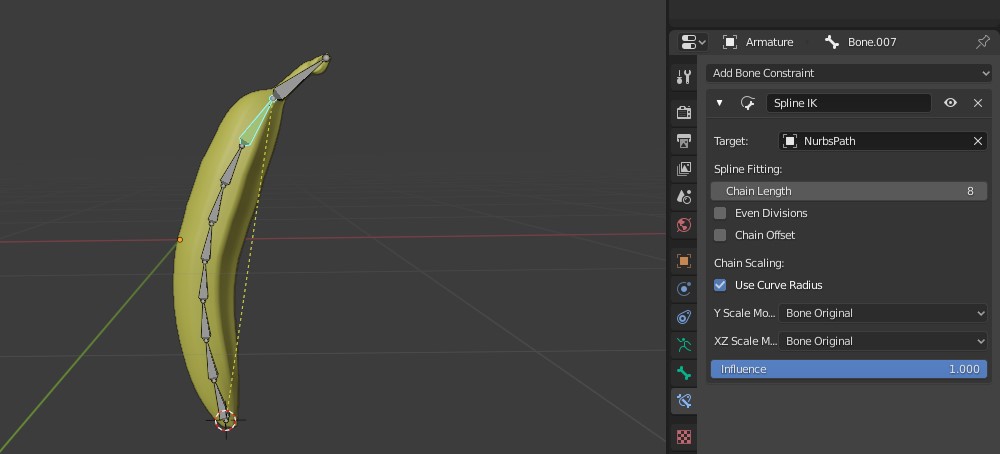
Now we can add the Spline IK Constraint. I have aligned my curve to the tip of the bone before the stem on my Banana, you can do the same to allow extra control of the glans if you are using a penis.
Note
You can see how the banana is distorted. This is because the original object was not straight and for the purposes of this tutorial I have decided not to spend time correctly aligning my path to follow the curve.
Now select that same bone and add a Spline IK Constraint. Chain Length should be the number of bones you need the spline to cover, if you are unsure you can just increase it until it doesn’t look weird anymore. Set the two scale options to Bone Original.
Now if you edit your spline and move the vertices your rigged object should move around in nice curves to follow them.
You now basically have the same rig used in the tentacle tutorial. Now to make things interesting. We can use empties & extra bones to give us some advanced control of our banana.
Empties & Hooks
Now you need to create empties for each point you have in your path/curve.
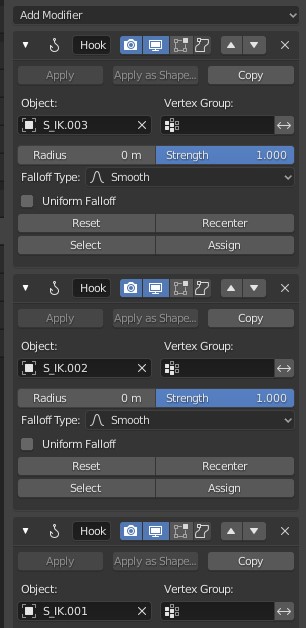
To do this follow the same method of using your 3D Cursor. Then create an empty, the shape is your choice but I use a sphere. Scale each empty down if it is too large and also apply the scale (Ctrl + A) just in case. Rename each one to something sensible too, I am using S_IK.001 etc.
Now edit your path/curve and for each empty add a hook modifier, assign a matching empty and then select the matching vertex in your curve and hit the assign button on your hook modifier.
Now you should be able to move your empties around (in object mode) and the banana will move with them.
At this point you are essentially all done. However we can go one step further, which is useful if you are using a penis.
Bones & Parenting
For this part you will need a root bone. If you move the root bone all of the penis bones will move. If you do not have one you will need to make one. This can vary from model to model so I won’t be covering how to add one here.
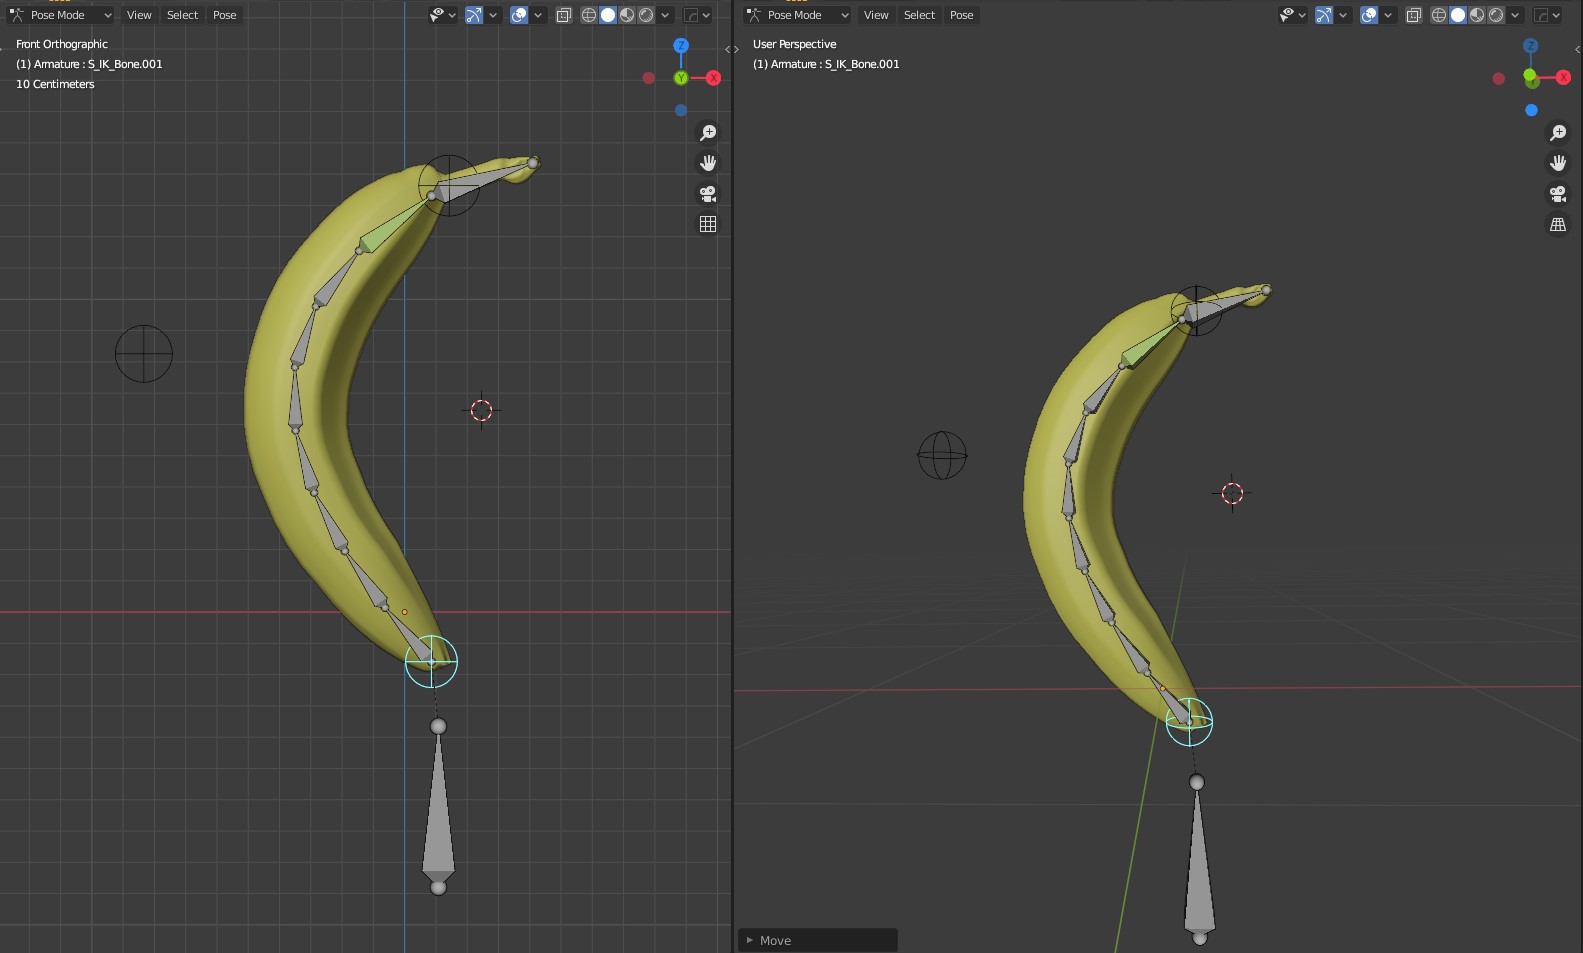
Now you can create some new bones to allow you to control the rigged object from inside your rig as using the empties, which you have to go into object mode to do, is a little clumsy.
To do this, in edit mode on your armature, simply select the same head or tail of the bone you used previously for positioning things and extrude a new bone. Afterwards name it something sensible (S_IK_Bone.001). Do this the same number of times as previously and make sure you go to the Bone Relations in the properties panel and remove any parents. Only the bone that is next to the base should have a parent & it should be the root bone.
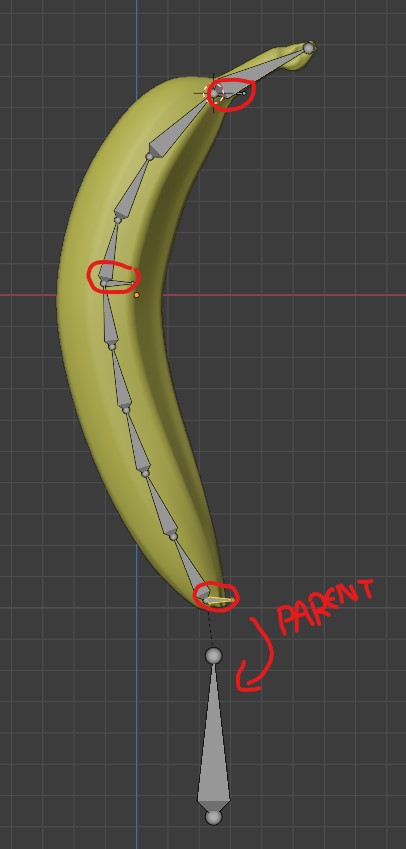
Now for a slightly tricky part. Select a bone in pose mode, then in object mode select its matching empty, then also select the armature (so the armature is the active item). Now use Ctrl+P and select Bone Relative to parent the empty to the bone. I have found setting the parent using the properties panel will not always work here and generally moves the empty to an undesired position. This is likely solved by applying the empty’s location first.
Do the above for each of your bones/empties. Now if you move the root bone, or any bone that moves the root bone, you will notice that the object moves along the curve instead of the curve moving with the object.
There are, understandably, occasions where you want everything to move together. To do this add a child of modifier to each of your bones and set the parent to the root bone (don’t forget to hit set inverse). Now you can increase or decrease the influence slider to set how things should work, you can even keyframe it!
Mission Complete!
That’s it. Hopefully you should have a complete rig that allows you to control your object in two different ways.
As an extra tip you can also use the Viewport Display options of the bones to show a custom shape, even using your empties you already have. Just hide the empties using the outliner so you don’t accidentally move those instead of the bones.
This was a difficult article to write. There were a lot of parts I had trouble explaining, and I’m still not hugely happy however I hope it helps. Certain parts are processes to understand rather than steps to follow and can be applied to a lot of situations.
As mentioned I am aware there are parts of this that could be better so if you have any problems please leave a comment and I will try my best to help. Remember not to post anything explicit though or your comment will not make it past moderation.
im not sure what im doing wrong whenever i assign the hook modifier the hook no longer deforms the mesh at all and acts like ive unhooked it,
Hi,
I’m afraid I’m not sure what is happening. Once you’ve added the hooks will the mesh still deform if you move the curve verts?