Today we are going to look at how to make Daz Studio 3D character morphs. In particular, body morphs. I will be working with Genesis 8 here, but you can apply most of this to Genesis 3 too.
Getting The Base Mesh
First up we need a base mesh to work on. I’ll put instructions for both Genesis 3 and 8 here even though we will be actually be working on Gen 8.
Genesis 3 Export
- Load Genesis 3 base model. This is the version named ‘Genesis 3 Male/Female’.
- Select Genesis 3.
- In ‘Parameters’ under ‘General’ change ‘Resolution Level’ to ‘Base’.
- Also change ‘SubDivision Level’ to 0 to be safe.
- Go to ‘File’ -> ‘Export’ and save as an OBJ.
Genesis 8 Export
- Load the Genesis 8 base model. This is the version named ‘Genesis 8 Male/Female’.
- Select Genesis 8.
- In your library under ‘Genesis 8 Female’ go to the ‘Developer Kit’.
- Run the ‘Export Base Resolution OBJ’ script and save as normal.
I have previously had issues with exporting Genesis 8 in the way used for Genesis 3 so I always advise this method if possible. You can get the Developer Kit for Genesis 8 free as part of the ‘Genesis 8 Starter Essentials’ from Daz.
You should know
Everything visible in the scene will be exported so disable visibility on anything else in the scene.
Importing The Base Mesh
I will be using Blender for this section. If you’ve never used a 3D modelling application before I would suggest Blender as a great free way to get started. Blender is an immensely powerful program but can be very daunting to use. With that I will not be going through every command or step in Blender so I recommend at least a minor working knowledge of Blender. A great start is Blender Guru’s awesome Doughnut based video tutorials.
If you are familiar with another application like 3DS Max, Cinema 4D or Maya then feel free to use what you know. Most instructions should be interchangable between programs.
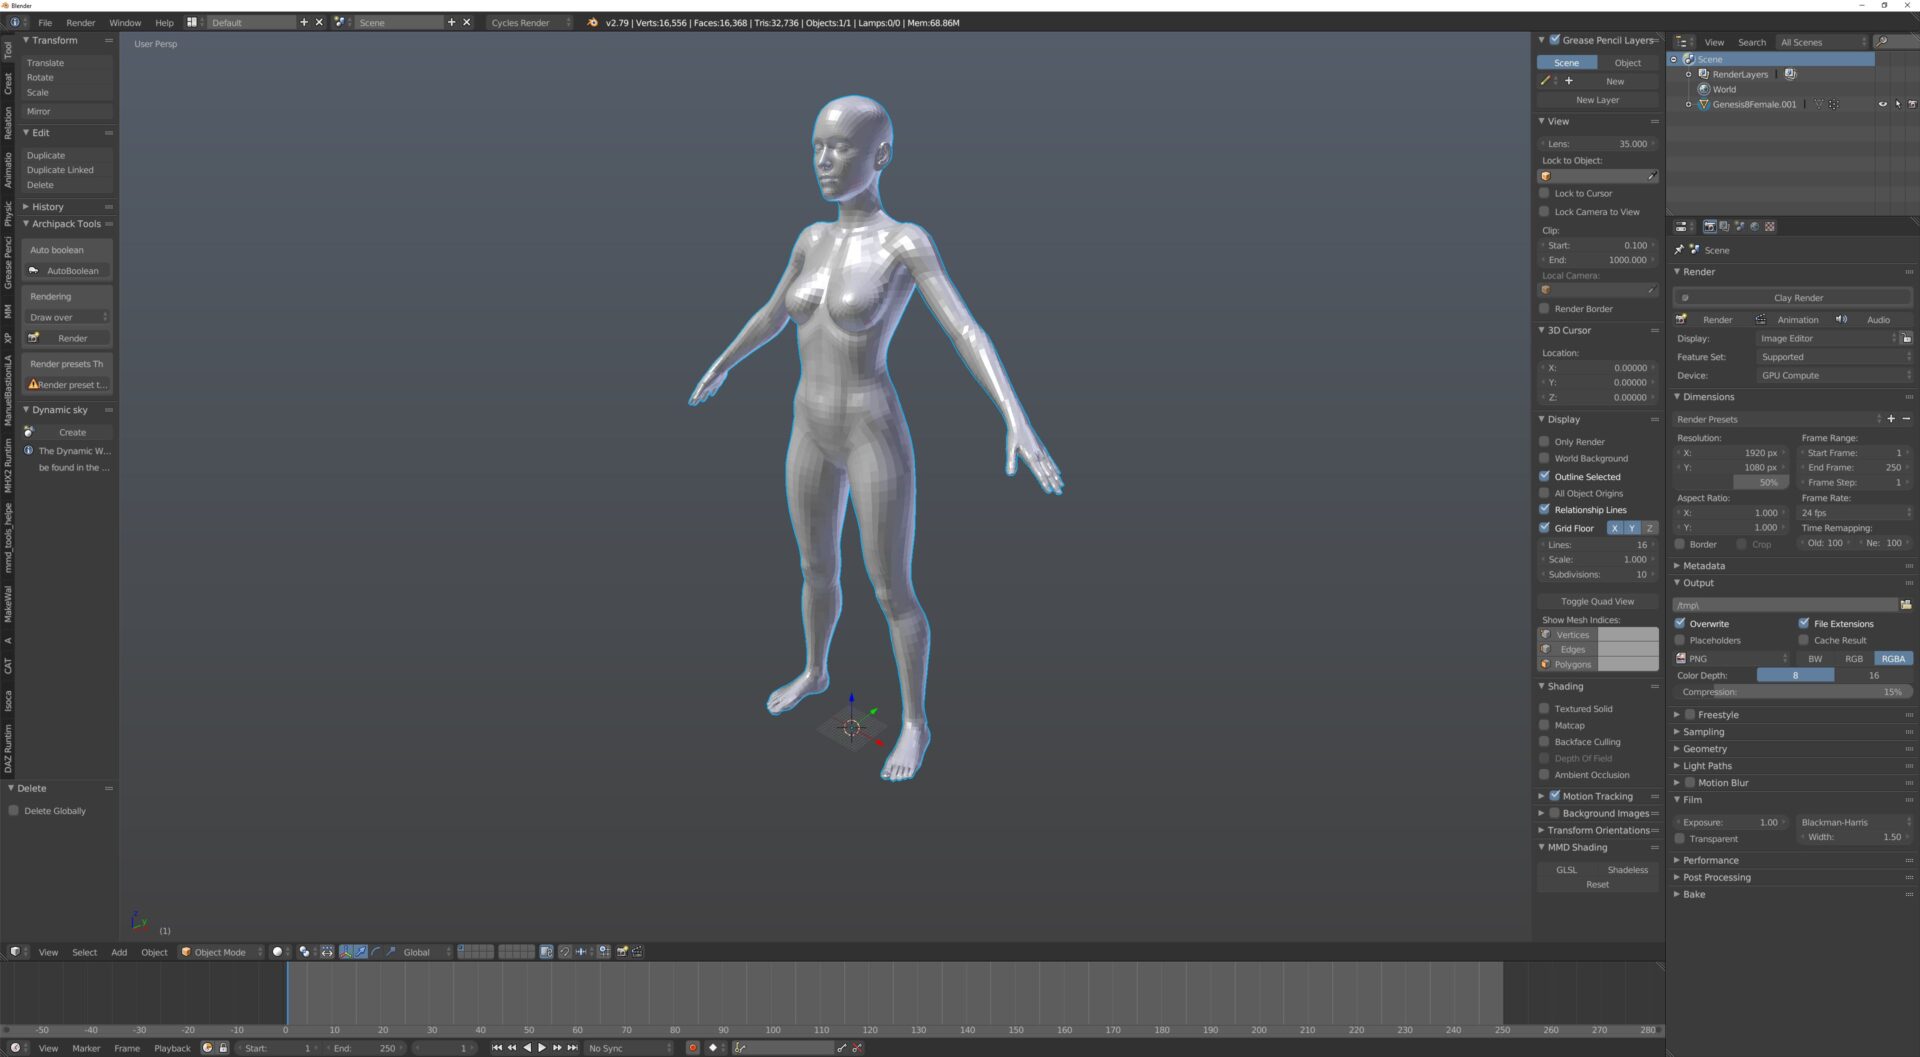
First up, load your base mesh into your program. In Blender that is via the Import Wavefront OBJ option. During the import it is important to make sure ‘Keep Vert Order’ is selected. Everything else should be fine at their defaults.
Pressing the ‘period’ (decimal point) key on your number pad will focus Genesis in the Viewport, which is helpful after importing. If you see something like the image below, congratulations, you’ve successfully imported the Genesis base mesh into Blender.
Please be aware
Genesis will be gigantic in Blender due to the unit scale difference. If you find the grid useful you can increase the scale in the ‘Display’ options, those are found by pressing ‘n’ while over the 3D Viewport.
Creating The Morph
Now we can get onto creating the morph. I can’t really make a detailed guide for this section as it depends on the morph you wish to make, however I can give you some tips.
Subdivision Surface Modifier
The subdivision surface modifier is your friend. Before you even start to create your morph put a SubD modifier on your mesh. You will normally want to use 2 – 3 Subdivisions to match what Daz will render.

If you find things are running slow while editing your mesh, just drop the SubDivision levels down to a more manageable number and push it up when you want a preview.
Smooth Shading
Enable smooth shading using the ‘Smooth’ button under the toolshelf. You can open that by pressing ‘t’ while you are over the 3D Viewport. This will help make things look smoother which is helpful for organic modelling.
Proportional Editing
In Blender one of the best ways to make a morph is using ‘Edit Mode’ to move vertices around. However making edits while avoiding making lumps/creases can be problematic on complex meshes.
Proportional edit mode will move de-selected vertices in relation to the selected vertex using the pre-selected falloff method. This basically means that Blender will move the vertices inside your circle of influence to prevent undesirable lumps and bumps from appearing.
No Mesh Addition or Subtraction
When creating morphs you cannot add or subtract from the base mesh. Doing so will cause the morph to fail when you try to use it in Daz Studio. Using a Subdivision surface modifier is fine provided you use disable it before export or make sure to de-select ‘apply modifiers’ when exporting back to OBJ.
No Fine Details
A morph should be used to make modifications to the body shape rather than fine details. So if you want to give your character those ‘thicc’ thighs or stubby fingers, that’s great. It shouldn’t be used to try to add fine details such as veins or cracks/wrinkles in skin as the base mesh just isn’t detailed enough for that.
It should be noted that it is possible to add finer details via the mesh but Daz only gives access to the tool used for making HD morphs to their PA’s. Any discussion about that on their forum generally ends up with no progress and it being locked so I wouldn’t bother starting a thread if you were inspired to do so.
For us mere mortals that don’t have access to the HD morphs making tools you can instead sculpt in Blender or ZBrush and export a normal or displacement map. Those can then be used to apply a higher level of detail. I’m afraid how to do that is outside the scope of this article though.
Exporting Modified Mesh
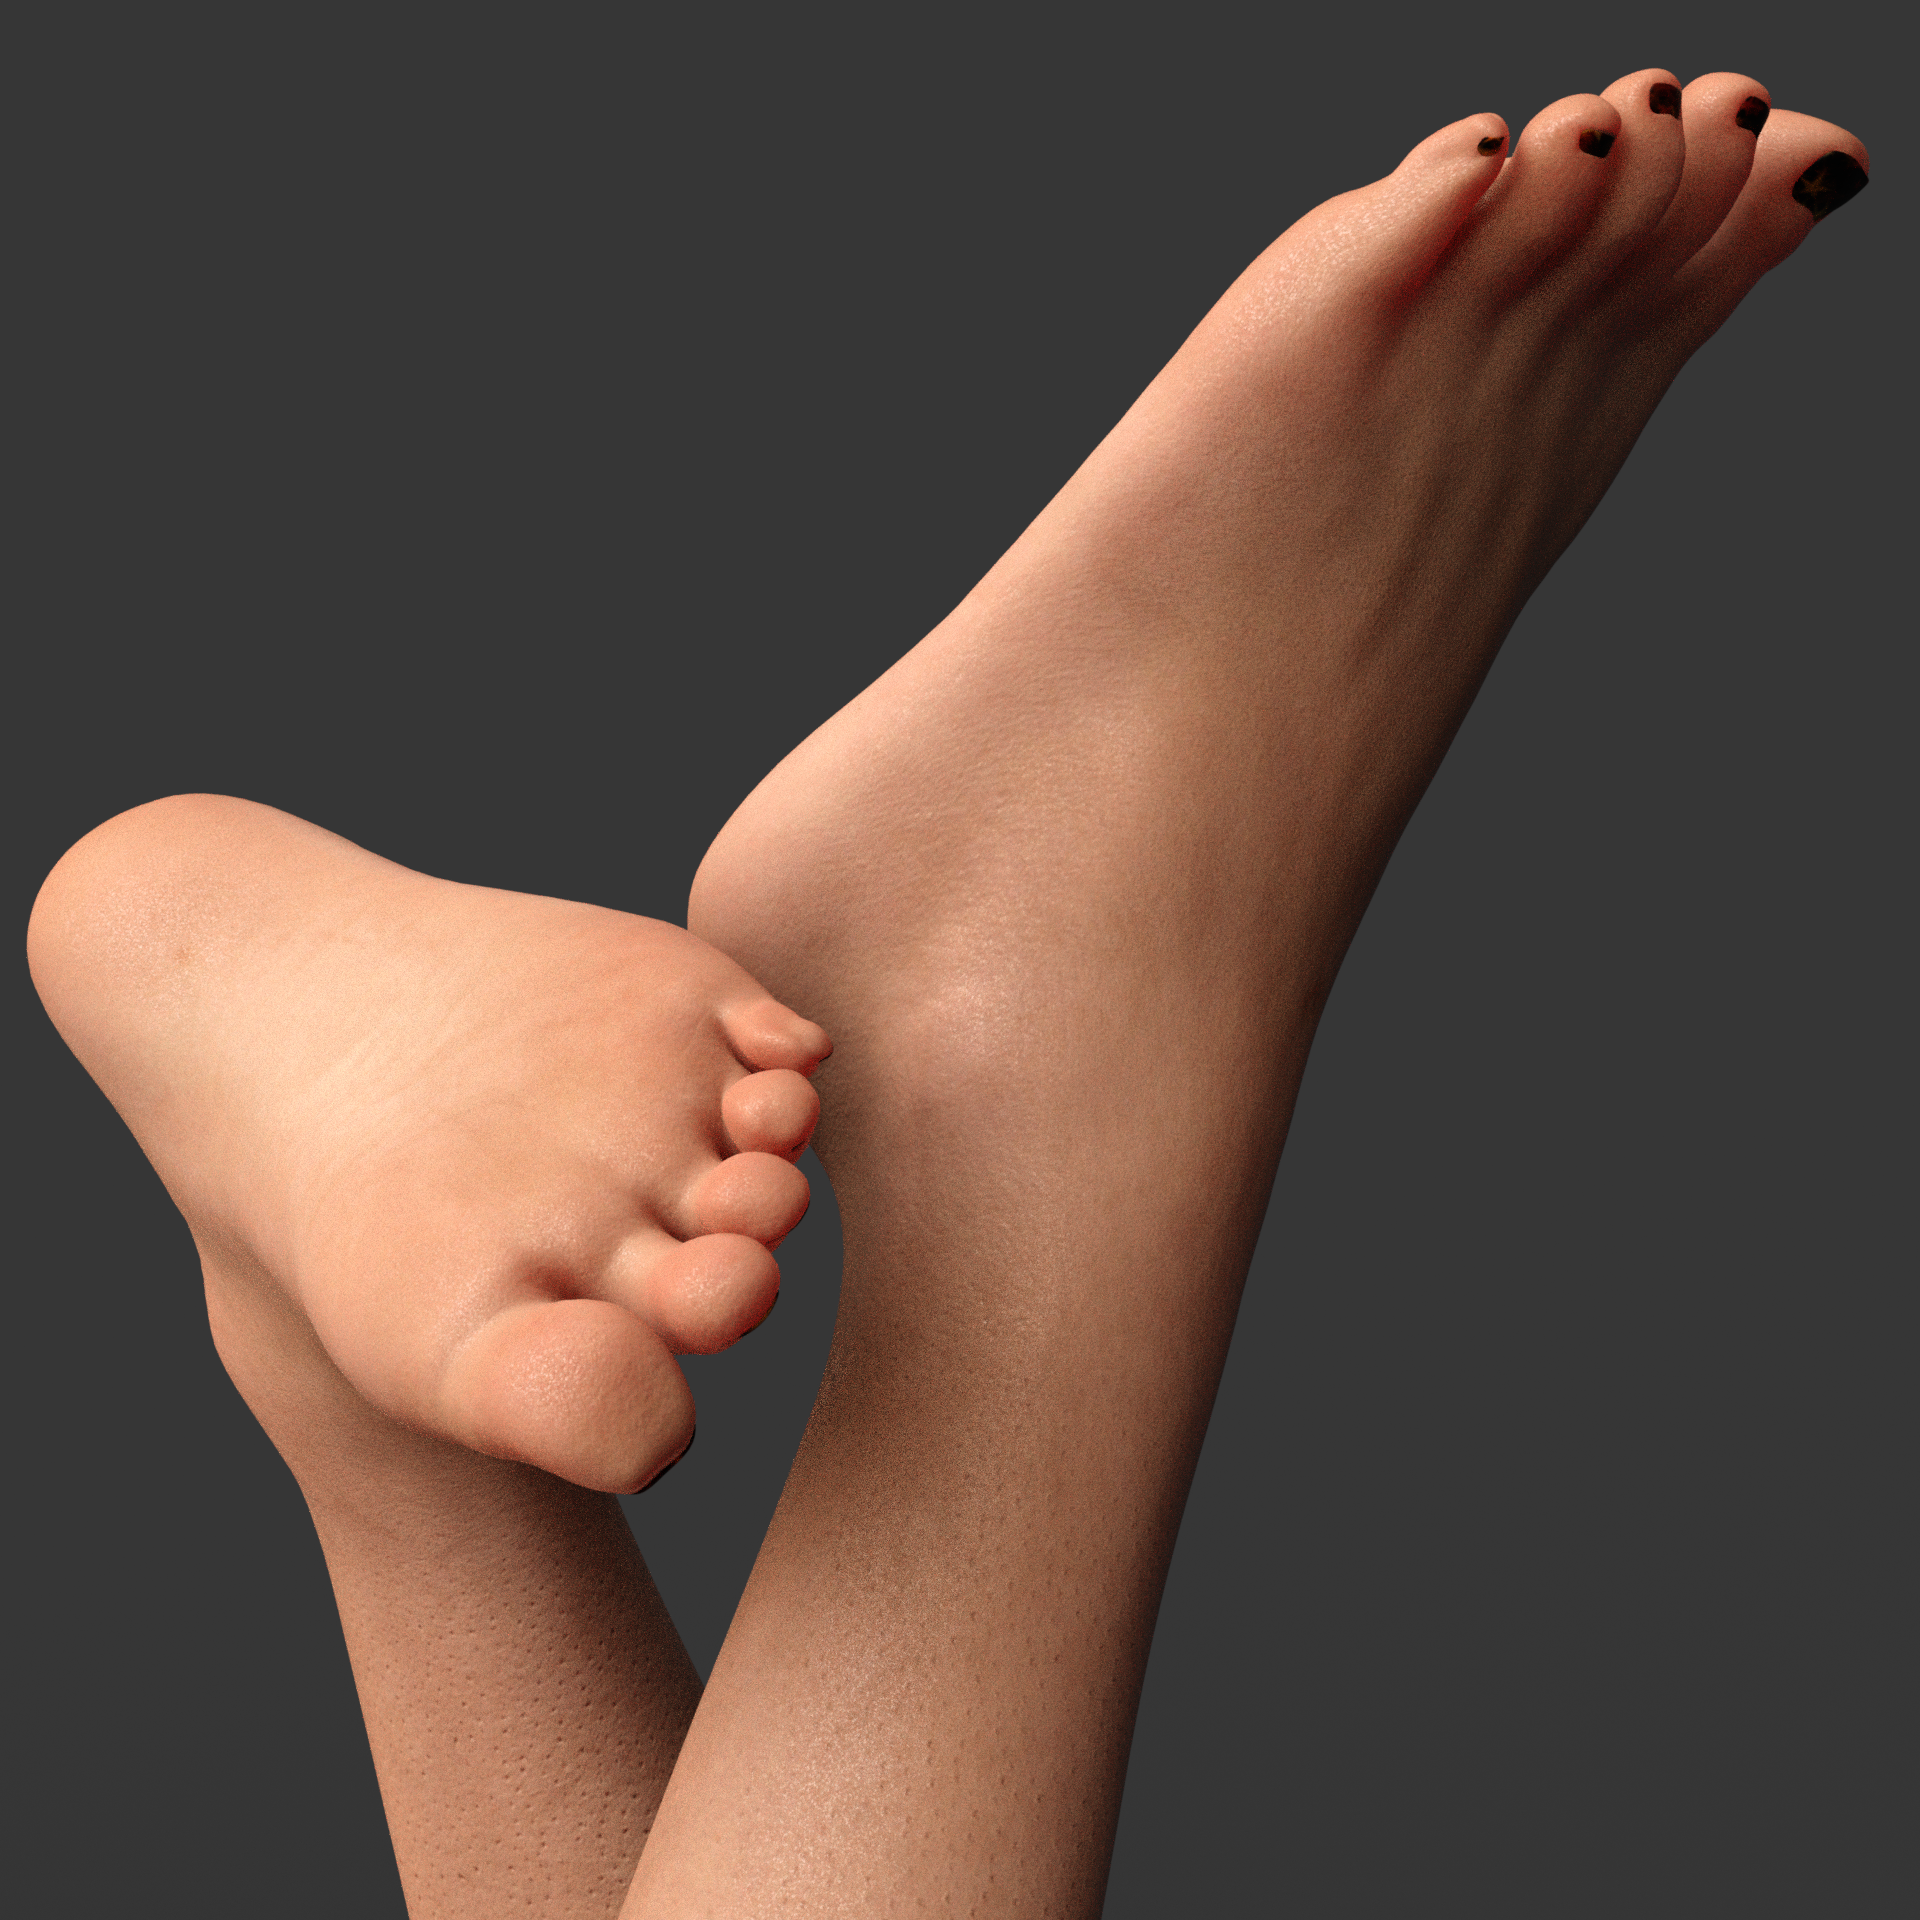
Once you have made your modifications you can now export your mesh. In my case I have made a morph for Genesis 8 Female’s feet as I hate how ‘sausage’ like the default toe shape is. Here is what mine looks like with a SubDivision modifier at level 3.
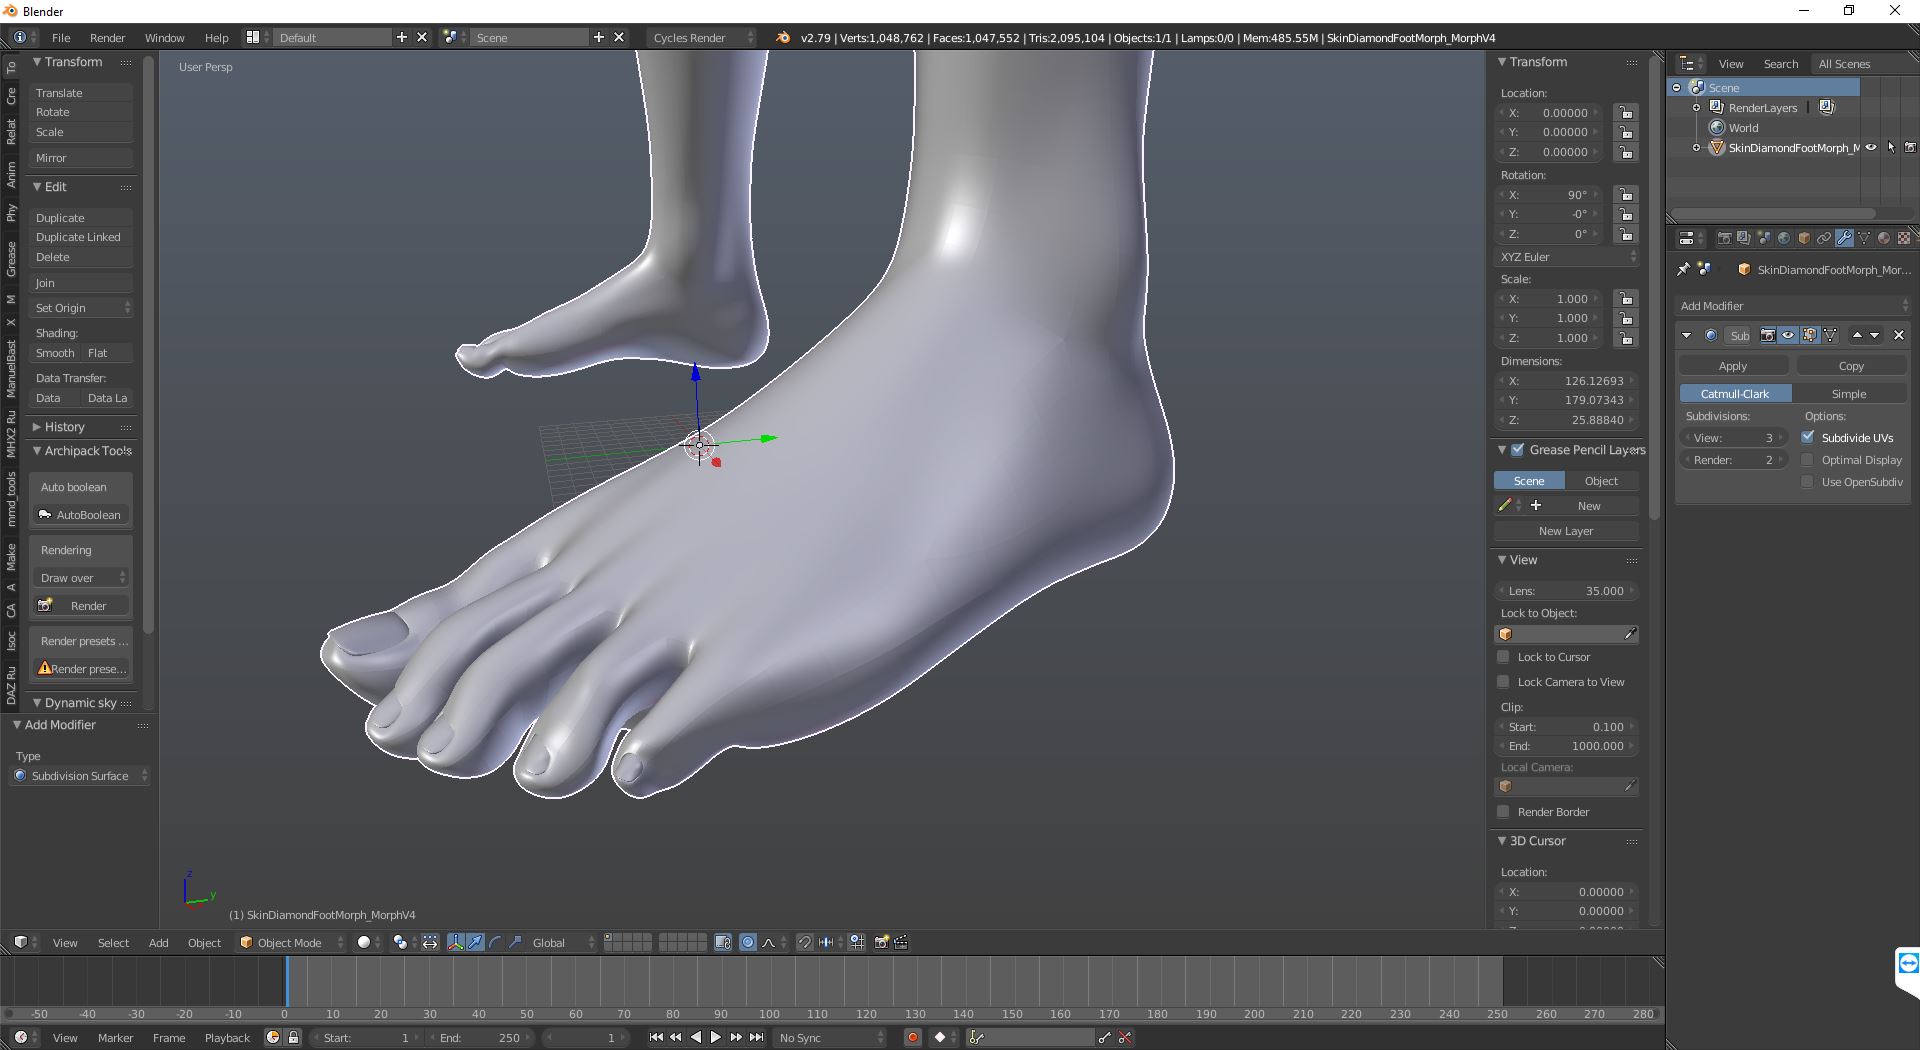
To export all you need to do is make sure the mesh is selected and go to ‘File’ -> ‘Export’ and select Wavefront OBJ. When exporting make sure to set select ‘Selection Only’ and ‘Keep Vertex Order’. Disable ‘Apply Modifiers’ if you have Subdivision or any other modifiers that will effect vertex count enabled.
Using The Morph
Back in Daz we are now ready to use the morph. To do that select Genesis 8 (or 3 if you are using G3) and go to ‘Edit’ -> ‘Figure’ -> ‘Morph Loader Pro’.
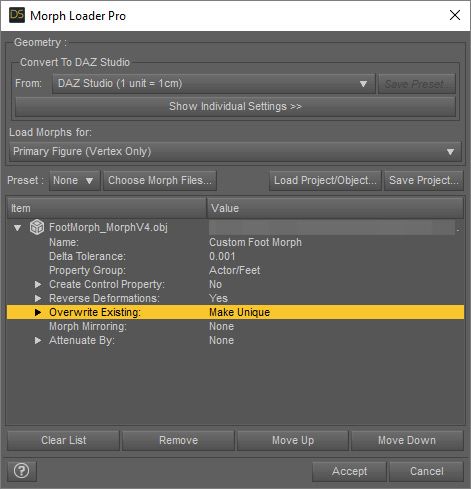
These are the settings I used for my Foot morph. You should select a name that suits your morph and select a property group that makes sense for the particular morph. You can even create your own property group if you wish.
Hit ‘Accept’ and your morph will be loaded onto the model. Just find it in the property group you set and push up the slider to enable it.
If you get a message that the morph failed to load due to the Geometry not matching then you will need to make sure you didn’t accidentally add or remove geometry, or leave a modifier enabled with ‘Apply Modifiers’ selected on export. Also check that your base mesh was created using the instructions shown at the start of this tutorial. Those are the most common reasons for the morph failing to apply.
Mighty Morphing Complete!
That’s it, you have successfully created a morph. If you want to save the morph to your character you can by dialing the morph to 0, so that it isn’t active when the character loads, and using ‘File’ -> ‘Save As’ -> ‘Support Asset’ -> ‘Morph Asset(s)’.
In the box that appears enter a Vendor and Product Name and use the twirler to find your morph and tick it. DO NOT tick only the main Genesis figure or it will save ALL morphs. You might also want to select a different Daz 3D Library path to keep your created morphs separate from your main library.
Free Genesis 8 Foot / Toe Morph
If you made it to the end, congratulations! This tutorial ended up way longer than I’d have liked it to, but as a reward I’m offering the toe morph I made for free via my Deviant Art account.
To install just merge the folder with your own ‘data’ folder in your Daz 3D library and it will be available under ‘Actor/Feet/Morphs’ when you load up any Genesis 8 based figure.
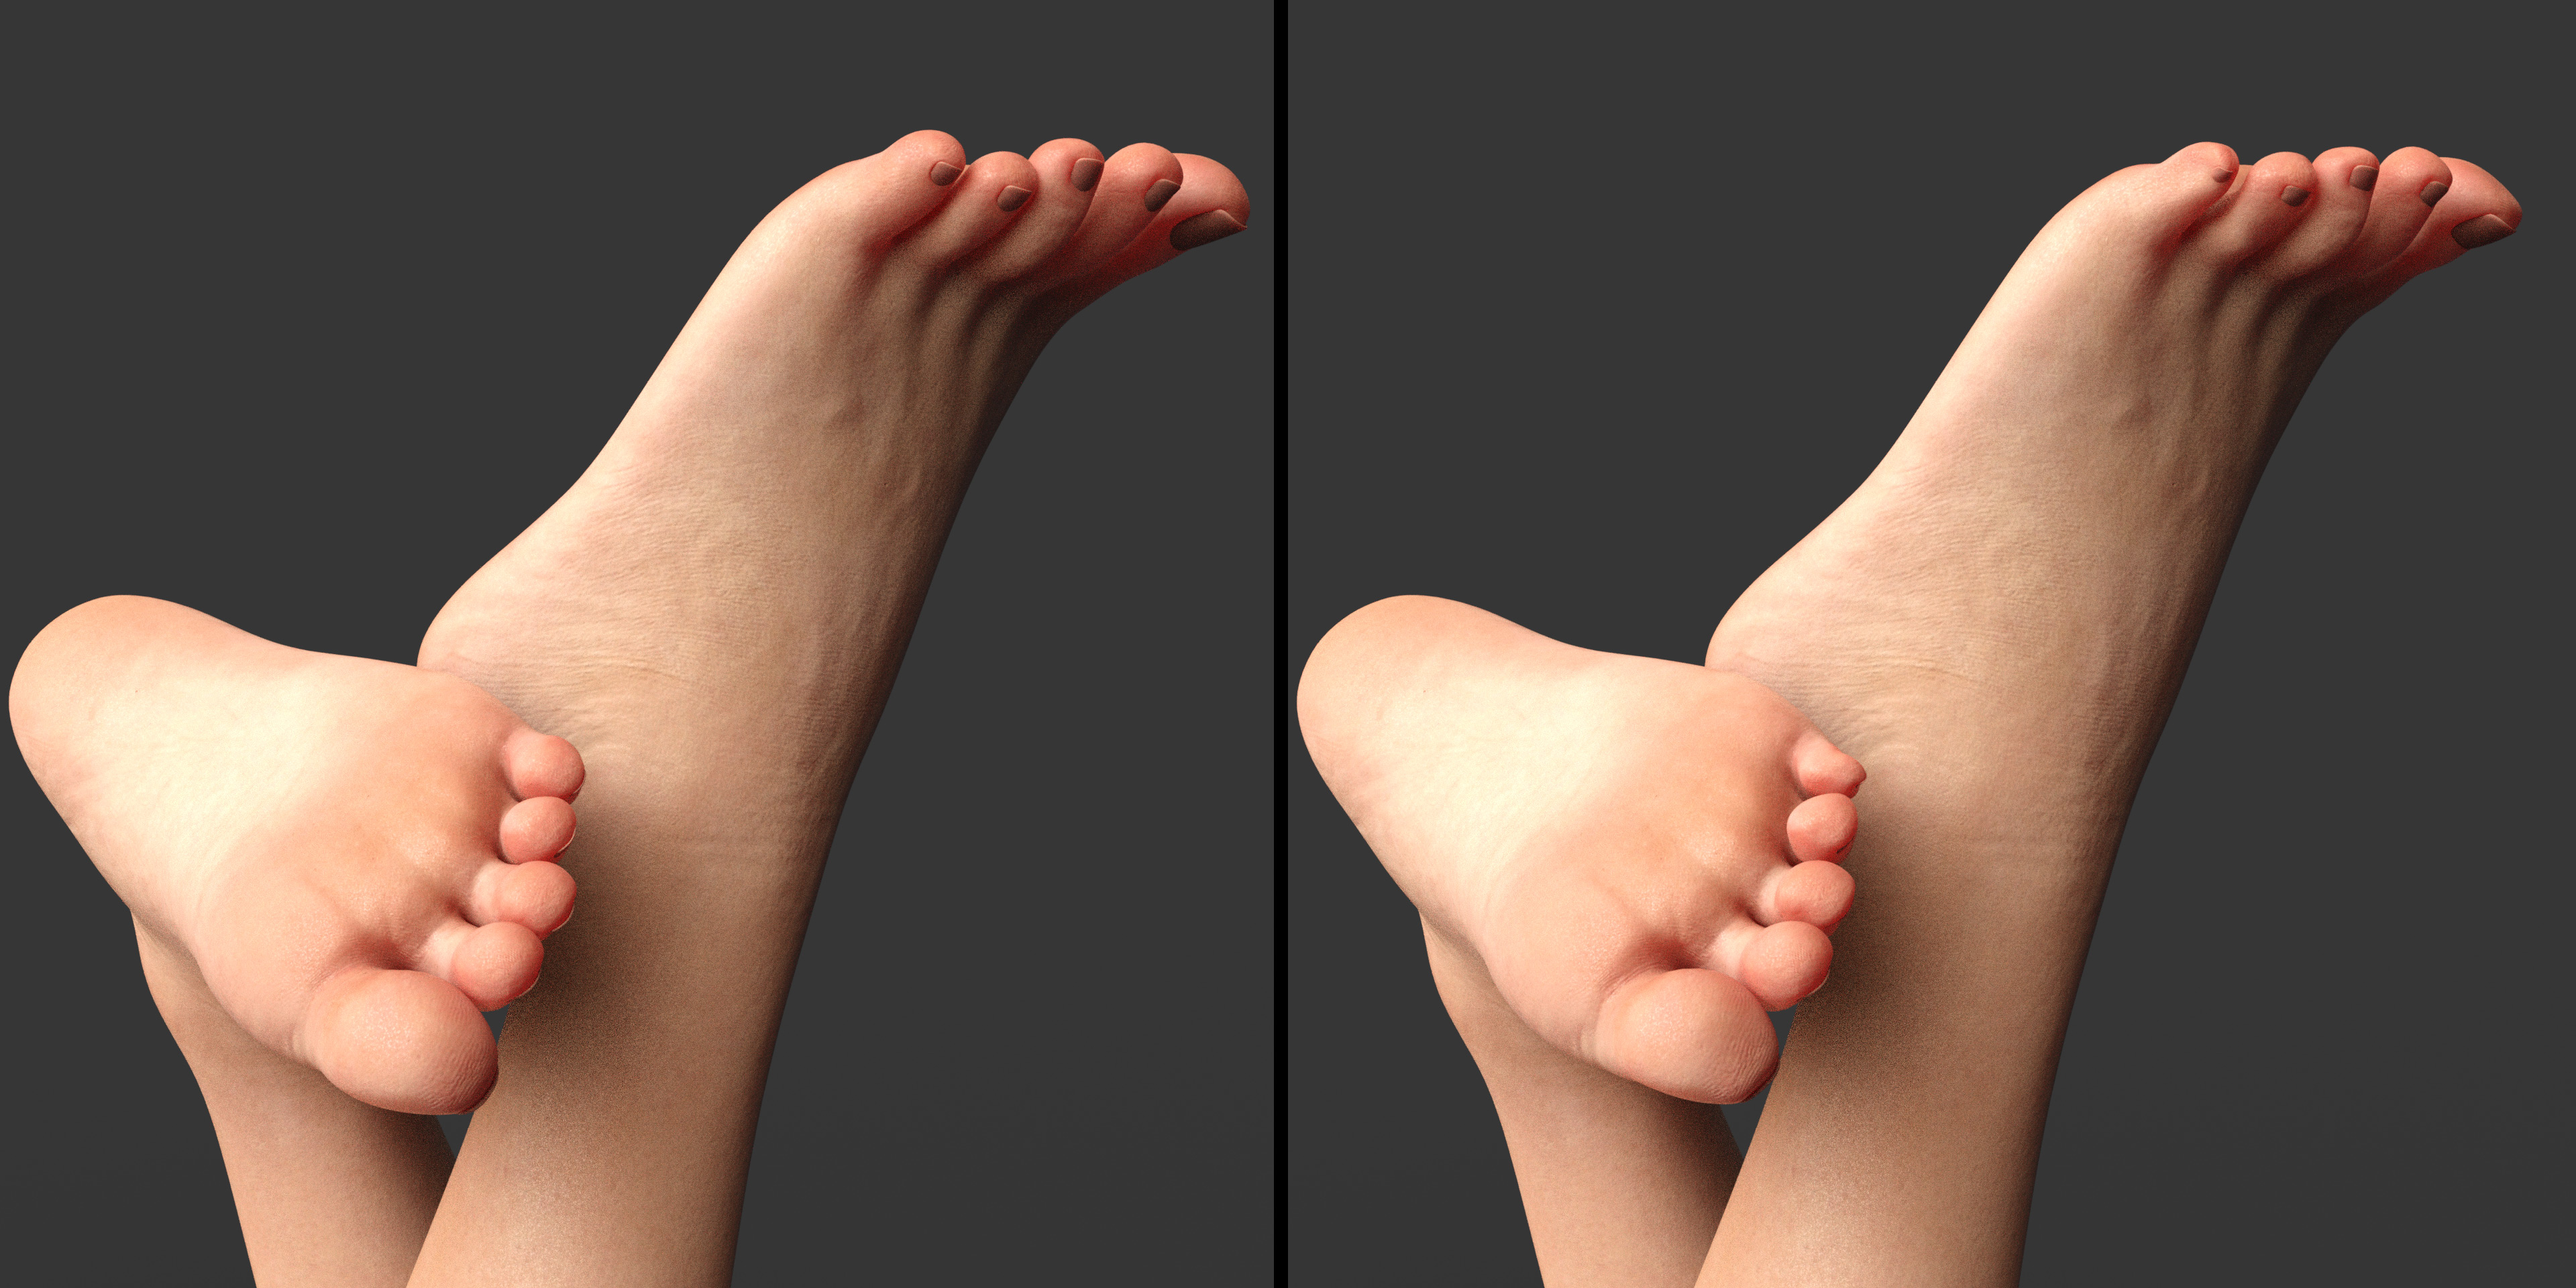
Genesis 8 Base No Morph (Left) | Genesis 8 Base Toe Morph (Right)
The difference is very subtle, but I much prefer the morphed version as the toes have a little more character. I will also be improving on it and will update the link as I do.
One note is that this morph was created for Genesis 8 Base. It will work with all models based on Genesis 8, but you may need to make a corrective morph or dial it down a little on some due to the difference in toe/foot shape on specific models.
As an example, one of my favorite Genesis 8 Models Shuang will require a corrective morph on her little toe if I want to use the toe morph on her. You can see how it looks without a corrective morph below.
The steps for creating a corrective morph are for another tutorial.
If you have any questions or comments feel free to ask me on my Deviant Art account or using the comments below.
Very clear process. I have been learning Blender intermittently for a few months, and just started looking at Daz yesterday, and I have to ask- why would you want to port stuff back to Daz? Everything about rendering, physics, and modeling is just way more powerful in Blender, so what is the attraction? Is there something about Daz I’m missing?
I can definitely see using Daz as a waypoint for basic character development and fitting clothing and other assets- I haven’t figured out an easy way to do that in Blender- but from what I can see everything else is faster and more powerful in Blender. I feel like if I were to move a Daz figure into Blender to morph, I’d just keep it there for everything else, but if you see a reason to take it back to Daz, I hope you’ll share.
As you might have guessed from more recent tutorials the answer is that I don’t. I use Blender for pretty much everything bar clothing creation which for the moment is still handled best by Marvellous Designer.
I can’t speak for others but if I were to answer as if I did not use Blender I would say a few things:
Skin shading is exceptionally easy to get looking good in iRay, along with built in metallic flakes, dual lobe specularity and top coats. While they are all more than possible in Blender they are not just a click away.
The ‘play dress up’ aspect is a exceptionally easy and quick way to change a character’s look. This is easily the biggest draw.
All models being based on the same base mesh makes compatibility of props and clothing work very, very well.
Finally dforce is a really excellent cloth engine. Numerous times have I purposefully imported a mesh into Daz from Blender just to use dforce. It is quick, accurate and uses GPU acceleration. The cloth sim in Blender is getting better and better & the new cloth brush + cloth mesh filter are amazing, but I can still see myself using dforce on some occasions.
I still like playing around with the vast library of models & clothing and if someone needs something ‘right now’ that library is a God send, but I will always go back to Blender & can only see it getting better & better.
Hope that helps!
One extra note I wanted to add that someone who uses Daz a lot mentioned to me. Blender does Everything (pretty much). Daz is for posing, clothing and rendering. Some like that it has a focused feature set. It is also (somewhat) simpler to use and has some pretty impressive systems enabled by the previously mentioned ‘standardisation’ of their model geometry and rigging. Blender does not have that. The nearest you get to a standardised rig is Rigify, which can be awful sometimes or maybe Blenrig.
I’d say give Daz a try if you are curious. The Genesis 8 Model pack is still free (I believe), they have some freebies on their store, and it’s fun to play around with. If nothing else the experience with iRay is interesting.